24 October 2011

Apple and Raisin Muffins

I've wanted to make muffins for ages but never had a muffin tray... then I got one thanks to the lovely but evil le creuset sail a couple of weeks ago. Now the wedding season is finally over I spent most of Sunday in the kitchen baking and on seeing some granny smiths that needed eating I decided to launch into muffin making. They don't look like the ones in the shops that I've seen but that's fine isn't it? They went down very well with the boys at half time during the Fulham game on Sunday afternoon.


Apple and Raisin Muffins

Makes 12

225g plain flour
1 tsp baking powder
1 tsp bicarbonate of soda
100g caster sugar
1 large egg, lightly beaten
60g unsalted butter
150ml milk
2 apples, peeled and grated
1 tsp ground cinnamon
60g raisins

Pre-heat the oven to 190C/Gas Mark 5. Line your muffin tins and melt the butter and set aside to cool a bit.

1. Sift all the dry ingredients together into a bowl and then add the apple and raisins.

2. In another bowl whisk together the egg, butter and milk. Add this mixture to the dry ingredients and quickly stir everything together. It should be quite thick. You can add a drop more milk if you think it's too stiff but you really don't want to overwork the mixture.

3. Fill the muffin cases until they are about two thirds full and then bake in the oven for 15-20 minutes until risen and golden.

4. Leave to cool in their tin until they are cool enough to be handled and then transfer to a cooling rack.
Not bad for a first attempt!
SHARE:

17 October 2011

Simple Salad Dressing #1

I know most people know how to do a salad dressing but this is one of my favourites and I make enough to put in a bottle and then it sits happily in the fridge being yummy and  you don't have to make up a new batch every time you have a salad.

I've used the regular measurements for one batch if you want to fill a bottle multiply all amounts by five except the garlic (use 2 bulbs instead of one), salt (use 1 tsp still and then add to taste) and pepper (same as salt).

Simple Mustard Salad Dressing

For 1 salad

1 tsp Dijon mustard
1 tsp caster sugar
1 tsp salt
1 tsp pepper
1 tbsp cider vinegar (or red wine if you prefer)
4 tbsp rapeseed oil
1 tbsp olive oil
1 garlic clove, crushed

Whisk together, or if you are making a bottle full I do this in a blender.

SHARE:

11 October 2011

Sarah Raven's Uncooked Autumn Chutney

A lot of people I know are scared of making chutney and so for some time I've been trying to track down the easiest chutney recipe to put on here so those people have somewhere simple to start. I think I have finally found it, once again thanks to Sarah Raven's Garden Cookbook.

I made half quantities of this because my fridge is filling up ridiculously fast at the moment with things I've made in jars and I just wanted to try this out to see what it was like but I've put the full quantity amounts here as per the recipe. It is also, apart from the 36 hour wait, very quick to make. I did the chopping etc quite late on a Sunday night and it didn't take very long at all!

Uncooked Autumn Chutney

Makes 7-8 jars

900g apples, peeled and cored
450g onions, quartered
450g stoned dates
450g sultanas
450g demerara sugar
1 tsp ground ginger
1 tsp salt
Cayenne Pepper to taste
450ml white wine vinegar

You will just need a big china mixing bowl and your food processor if you have one otherwise a sharp knife and something good on the tele to watch while you chop, will do. I used granny smiths and I weighed them before I peeled/cored them.

1. Chop the apples, onions and dates or pulse them carefully in the food processor - you don't want to over-do it and make a puree. When you are chopping everything remember that it's not going to be cooked down so you want it to be as fine or as chunky as you would want to eat - I think I could have done with making mine a bit smaller.

2. Put the mixture into a large china bowl and add the rest of the ingredients (sultanas, sugar, ginger, salt, cayenne and white wine vinegar) and stir together.

Everything in it's bowl


3. Cover with clingfilm and leave for 36 hours, stirring occasionally.

Everything in it's bowl after 36 hours


4. Put into warm sterilized jars. This will keep for months if not years and is delicious served with cheese on toast.

SHARE:

3 October 2011

Blackberry and Crabapple Jelly

For years I have been boring my family about going to pick blackberries - I'm always desperate to and then it just never happens for whatever reason. This year I dragged Joe and four over-excited Jack Russells out to the hedgerows near my mother's house and finally managed to get some blackberries to take home and make something with. I thought it was going to be jam... but then Joe found some crab apples and it turned into jelly.

I've always wanted to buy a jelly strainer but never did and so had a mini melt down at 9pm on the Sunday when I finally decided to start making jelly. Luckily my husband managed to rig me one up using a muslin and the cupboard handles but I now think I really should get one for any future jelly emergencies!

This was pretty easy to do - the setting point is the only nervewracking bit. For more info on jams and jellies I've created a whole page for them so you can have a look at that if you are having trouble.

Blackberry and Crab apple Jelly

Filled about 3 x 1lb jam jars

1kg blackberries
1kg crab apples
700-900g granulated sugar

Now if you have a jelly strainer then you will need that with a clean scorched muslin. If you don't then you need to rig one up. I used my largest saucepan for this and had a measuring jug under the muslin for the fruit juice to drip into. You will needed sterilised jars and lids and a ladle is handy unless you are clever and have a pan with a spout.

1. Remove all the stalks and any really yucky bits from the blackberries.


2. Remove the stalks from the crab apples and wash them if necessary, then chop them roughly - leaving the peel on and the core in.


3. Put in a large saucepan with 1.2 litres of water, bring slowly to simmering point and then simmer until the fruit is soft and pulpy. I think this took  around 40 mins for me.

4. Remove from the heat and pour into the prepared muslin/jelly strainer. Leave it to drip through overnight - resist all temptation to squeeze the fruit through as this will make the jelly cloudy.


5. The next day measure the juice - I had 1 litre - and for every 600ml of juice use 450g sugar.

6. Put the juice into a large pan and bring to the boil - as it begins to boil add the sugar and stir until it is all dissolved. Then boil rapidly for about 10 minutes until it has reached setting point - I used a jam thermometer but you can use other methods which I'll put on my Kitchen Tips page - there's a Jams and Jellies section.

7. Skim the jelly and ladle into jars and seal as quickly as possible. Use within 12 months.
SHARE:

29 September 2011

Kua 'aina

I'm pretty easy to please when it comes to burgers. I know the difference between a good burger and a bad one but I'm such a carnivore and constantly trying to be good so I don't become grossly overweight that when I decide to have a burger I have the whole thing and it's a real treat. So I was excited about Kua 'aina but not expecting much - we were there for my friends leaving do. She is Hawaiian and although hasn't lived there for a long time I think she's starting to be ever so slightly nostalgic about it so it seemed to be the perfect place for us to turn up and stuff our faces and say farewell.

I was actually quite pleased as were supposed to be going to a vegetarian restaurant which everyone says is excellent but I know would give me no-meat panic as soon as I look at the menu. Joe and I arrived late and everyone had just ordered, Joe in fact was even later than me so by the time he arrived people were tucking into their food. This was no bad thing as it gave us a chance to see what everyone else was having and make our decision. The menu has burgers, sandwiches and salads with a good selection of side dishes from proper fries and coleslaw to dill pickles and sweet potato. And the service is so quick that we got our food not long after everyone else so they didn't have to sit there and watch us eat.

We had bacon and cheese burgers and shared fries and dill pickles. We finished every last scrap. The burgers were cooked quite rare and served in little baskets - there was no dainty way to eat them but that's not part of the deal with Kua 'aina. Little wooden tables, tea lights, old surfing photos everywhere and a relaxed atmosphere, incredibly fast service and great prices this is a fantastic place to go - especially in these money crunching times. I've never been to Hawaii but I really think the atmosphere lives up to the name and the reputation.

Most of us had burgers (avocado and pineapple were other variations - not together though) and a selection of sides - the lady herself had Mahi Mahi sandwich and another veggie had a halloumi sandwich. These were just as big as the burgers and went down really well. We were all full and happy afterwards - except for one guy who ordered a cheese and bacon burger and just got bacon. But as he refused to just ask the waiter for a bit of cheese to be shoved in quickly which I'm sure they would have done happily I can't really count this as a bad thing. There were ten of us drinking beer and being noisy so I think one slight omission is completely acceptable. I've had worse from places where its £40+ a head.

Kua 'aina is proof that you can still go out, eat well and have fun with your friends and not spend loads of money. Highly recommended.

Kua 'Aina on Urbanspoon
SHARE:

21 September 2011

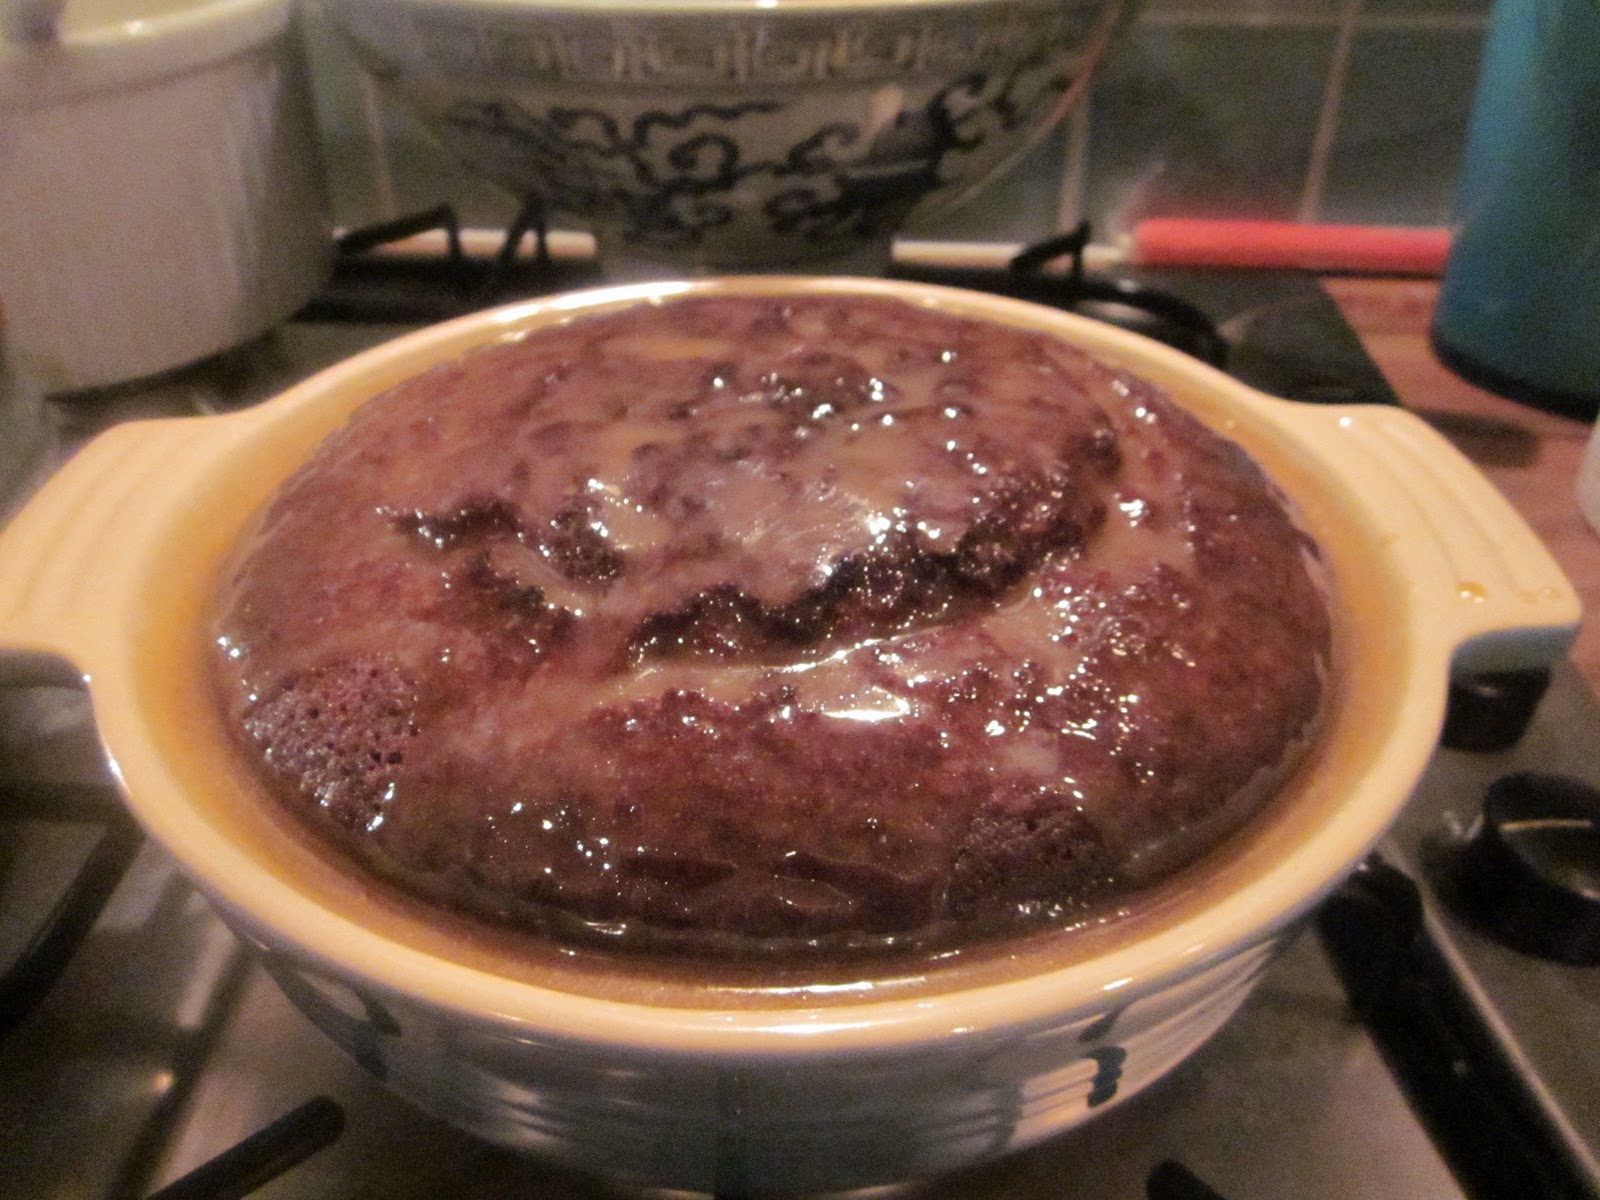
Rachel Allen's Sticky Toffee Pudding

I'm not a pudding eater as you know but another request from my cousin was the Sticky Toffee Pudding she saw in Bakeand I'd never made it again so I thought it was worth a try. It was incredibly popular and I think may well become a regular for quick, easy make ahead puds that are really impressive. My father-in-law even liked it and he usually is not at all enthused by my cooking. I will definitely try and be more organised and cook this ahead, and maybe even freeze it, when I know I have a dinner party coming up.

Sticky toffee pudding


Serves 6

225g dates (stoned weight), chopped
250ml black tea, not too strong
100g butter, softened
175g golden caster sugar
3 eggs
1 tsp mixed spice
1 tsp vanilla extract
225g self-raising flour
3/4 tsp bicarbonate of soda
Whipped cream to serve

Toffee sauce:
110g butter
250g soft light brown sugar
275g golden syrup
225ml double cream
1/2 tsp vanilla extract

Pre-heat the oven to 180C/350F/Gas Mark 4. I made this in a cake tin and then decanted into a round le cruset dish I have so could pour some of the sauce over it. Butter and flour the sides of the tin and line the base with greaseproof paper. You can coo in advance and keep for five or six days in an airtight container in the fridge or three months in the freezer. Just cover with tin foil and warm up in a low oven (defrosting first if frozen).

1. Place the chopped dates and tea in a saucepan and bring to the boil. Cook for a few minutes until the dates are softened and then remove from the heat and put to one side.

2. Beat the butter in a large bowl or in a mixer until soft. Add the sugar and beat until pale and fluffy. Beat in the eggs one at a time and then add the vanilla extract and spices.

3. Fold in the date mixture (including the tea). If you are using a mixer it may be easier to now transfer it all to a big mixing bowl and then sift in the flour and bicarbonate of soda and fold gently until mixed.

Pre-cooking... not very appetising
4. Pour the mixture into the prepared tin and bake for about 45 minutes until the top is just firm to the touch and a skewer comes out clean when inserted into the middle.

5. Allow to stand in the tin for about 5 minutes before removing and transferring to a serving plate or dish. While the cake is cooking make the toffee sauce as shown below.

6. I poured some of the sauce over the pudding and then put the rest into a jug so it could be poured over the slices as they were cut. Serve with whipped cream or ice cream.

For the toffee sauce:

1. Put all the ingredients in a saucepan and cook over a high heat for about 5 minutes, stirring regularly, until it has thickened. Serve warm.
Sticky Toffee Pudding
SHARE:
© Blue Sky and Bunting. All rights reserved.
Blogger Templates by pipdig