27 June 2011

Sarah Raven's Shallot Tatin

I've adapted this slightly from Sarah Raven's recipe in her lovely Sarah Raven's Garden Cookbook which is just one of the nicest presents I've ever received. I must have had it for three or so years and I still read through it and find new things I want to try out. I really like making tarts, pies and quiches for Saturday lunch and this looked like a great twist on an old favourite. As I said I've amended it slightly...

SHALLOT TATIN
Serves 4-6

500g shallots, I used big sweet ones but any will do
250g Camembert, ideally some that's been left out of the fridge and cut into thickish slices
40g unsalted butter
2 tbsp olive oil
1 tbsp soft brown sugar
500g puff pastry
salt and black pepper

Preheat the oven to 200C/Gas Mark 6/ 400F. You will need an ovenproof pan or frying pan. Not a very big one though - you want the onions to fit quite snugly in it.

1. Peel the shallots but leave them whole. Cook the shallots in boiling water for 8-10 minutes, drain and leave to one side.

2. In your ovenproof pan heat the butter and oil and, when the butter has melted, sprinkle over the sugar and allow it to dissolve gently before adding the shallots.

cooking shallots
My Shallot's looking like squid
3. Cook the shallots until they are a rich golden caramel colour. This takes longer than you think - I found about 15-20 minutes was fine. Remove the onions from the heat and start rolling the pastry.

4. You want to roll the pastry out to be slightly bigger than the pan and round. If you are using shop bought pastry it will probably come in a square so roll it out and then cut it in a circle as you trim it down to the right size for your pan.


5. Spread the slices of cheese over the shallots and then lay the pastry on top, pushing the sides down slightly.

6. Bake the tart for about 25 minutes until it is golden and risen.


7. Remove from the oven, allow to cool for a couple of minutes and then, very carefully place a plate on top and flip the pan over very quickly. You may need to ease a spatula around the tart slightly first to loosen it.

Inverting the tatin - I got my Mumma to do it!


8. This is great with salads for a tasty lunch - looks impressive too but is surprisingly easy to make.

Sarah Raven's Shallot tatin
SHARE:

25 June 2011

Nigella Lawson's Banoffee Cheesecake

3.15am is no time to be fretting about a cheesecake and I really don't recommend it, however this is a recipe you need to make the night before so take note of that before you embark upon it at 11pm having been delayed by your slightly time-irresponsible other half. It is pretty smug-making when it works though and isn't actually as difficult as many people imagine so well worth a try if you have crazy banana loving freaks coming to your house (banana's are the fruit of evil).

The recipe is from Kitchen: Recipes from the Heart of the Home - which I've been using rather a lot recently and is really fantastic actually.

I usually ignore all instructions for cheesecake base and ALWAYS use ginger biscuits because in the great war of biscuits, gingers always beat digestives. However, with all the banoffeeness going on her I decided to obey Nigella and use digestives and Joe says it was the right thing to do - gingers would have been a step too far. I also mostly refuse to have unsalted butter in the house as it's just so depressing and sad BUT sometimes it is good and I used it here and it was fine - it's also fine in pastry but only if you are capable of adding enough salt by yourself. A lot of people aren't - what's the point in cooking something beautifully if you are going to ruin by not seasoning it correctly - ok rant over, now for the cheesecake.

BANOFFEE CHEESECAKE
Serves 10

for the base:
250g digestive biscuits
75g soft unsalted butter

for the cheesecake:
4 overripe medium-sized bananas
60ml lemon juice
700g cream cheese at room temperature
6 eggs
150g soft light brown sugar

for the toffee sauce:
100g soft unsalted butter
125ml golden syrup
75g soft light brown sugar

You will need to preheat the oven to 170C/Gas Mark 3 and have a 23cm springform cake tin and a large roasting tin to use as a water-bath. Unless you have the whole evening to make the cheesecake the night before you need it I find it easiest to take the unsalted butter and cream cheese out of the fridge in the morning and then it's all the right temperature and ready to go when you need it later.

1. Wrap the outside (underneath and sides) of the cake tin with a double layer of clingfilm, then cover thoroughly with a double layer of tin foil. You need it to be waterproof so the cheesecake is protected in it's water bath.

Clingfilm wrap
Tinfoil wrap


2. Whizz up the digestive biscuits with the butter in a mixer until you have a sandy rubble that is beginning to clump and press this into the bottom of the cake tin. Press it all down well and then put it in the fridge to cool. Wash your mixer thoroughly - you want no crumbs left at all for the next bit.

Biscuit base


3. Mash the banana's well with a fork (or in my case get your husband to do it), add the lemon juice and set aside.

My lovely assistant mashing the bananas


4. Put the cream cheese in the blender and mix until smooth then add the eggs and the sugar. Blend together and then add the mashed banana and lemon juice and whizz until you have a smooth mixture.

5. Take the biscuit base out of the fridge and sit it in the centre of the roasting tin and then pour the cream cheese mixture into the cake tin.

Cheesecake in it's roasting tin
6. Put the roasting tin in the oven and pour recently boiled water from the kettle into the roasting tin so it comes about half way up the side of the cake tin.


7. Cook for about 1 hour and 10 mins but check it after an hour (mine took 1 hour 5 mins). The very centre of the cheesecake should still have a bit of a wobble to it but be set on top.

8. Remove from the oven and take the tin out of it's water bath and put on a cooling wrack. Carefully remove the foil and clingfilm and let the cheesecake continue to cool on it's rack.

9. To make the sauce melt the butter, golden syrup and sugar in a saucepan over a gentle heat until it's bubbling. Let it bubble for 1-2 minutes until it's foamy and amber in colour. Let it cool slightly and then pour into a small jug and leave to cool. Cover it and leave it out of the fridge in a cool place overnight or however long you want. I found it useful to do this while I was waiting for the cheesecake to cool enough to go in the fridge.


10. Put the cheesecake into the fridge when it's fully cooled and cover once it's fully chilled (it was the covering after it had been in the fridge for a couple of hours that I was doing at 3.15am).Do not cover with anything that is going to touch the top as that will stick to it. I used a big plate. Leave overnight.

11. Remove the cheesecake from the fridge about half an hour before you want to eat it. Work a spatula gently around the top edge and then put it on a serving plate and release the springform bit of the tin.


12. Whisk the sauce in it's jug and drizzle some over the cheesecake leaving the rest for people to drizzle themselves on their slice.
Nigella lawson banoffee cheesecake
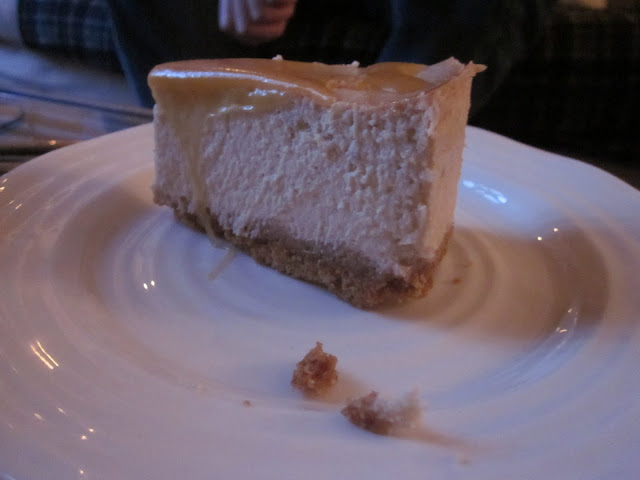
Ok so not quite as beautiful as Nigella's but pretty good I think

What's great about this cheesecake is it's so impressive and you can make it up to 2 days ahead and have it waiting in the fridge. The sauce can be made 2-3 days ahead and kept in an airtight container in a cool place. It can be kept in the fridge for up to 1 month.

banoffee cheesecake slice
SHARE:

21 June 2011

Sushi

I'm not sure if I could have married Joe if he wasn't a little bit obsessed by sushi. As someone who has been known to be a bit fussy about food I am in love with sushi - specifically raw tuna. I love it so much that I have been known to eat raw strips of (beef) steak that has been set aside for stir fry just because it reminds me of tuna. Lucky for me Joe has learnt how to make amazing maki rolls so I can feast on it whenever I want. When we're feeling spoilt, flush and lazy then we order it in but when we want a fun, DIY treat we make it and it is really satisfying once you know how.
Of course you can make whatever kind of sushi you like and there are some fantastic sushi and Japanese cookery books available but here's how we did it on Saturday night. A lot of these ingredients can now be got from big supermarkets but it's quite fun to go to Japanese/Thai specific ones. This is going to be a bit of a picture heavy post but it's so you can see how to roll and then do it yourself.

I've said cooked sushi rice because it needs to be cold before you use it. We make it in a rice cooker but you can just follow the instructions on the side - remember though it has to be sticky so don't panic and think you've made some sort of stodge.

Salmon and Tuna Maki Rolls
Serves 3

1 packet of seaweed sheets
2 fillets of fresh tuna
2 fillets of salmon
spring onions
1 cucumber
1 avocado
300g cooked sushi rice
soy sauce
wasabi paste
Japanese pickled ginger
Seasoned rice vinegar

Now I've said this serves three people - it could probably do four but if there's three of you someone gets amazing yummy leftovers for lunch the next day. We make bowls of miso soup for a starter and then just have a huge platter of this for everyone to help themselves from. You can do this reasonably last minute - cut everything up first and have it in the fridge ready to go. It's quite fun to do this while every one's sitting round the table if you have the space and the inclination.

Serve with wasabi, pickled ginger and soy sauce.

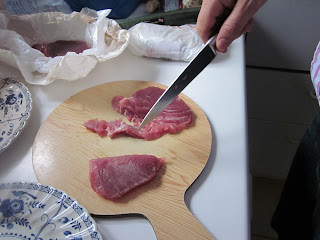
The fish must be as fresh as possible - we always get it from the fishmonger or from a trustworthy fish counter. You will be eating it raw so you need to know it's good. I know two fillets is very vague so I do have a picture to show you how big our ones were so you get the idea.
tuna on a chopping board
Our two tuna steaks

1. Cut the tuna and salmon into strips.

Sliced salmon and tuna
Salmon and tuna strips - pretty gross if you are not a fan of sushi I know
2. Cut the cucumber and spring onions into strips. You also want to cut the avocado into strips but remember this will brown so do it as last minute as you can.

Sliced spring onion and cucumber
3. When you are ready to get rolling the sushi make sure you have everything laid out - you want you plates of fish, vegetables and your bowl of cold rice easy to hand, the rolling mat in front of you, a really sharp knife on a chopping board next to it. You also want an egg cup full of the rice vinegar for sealing the roll.

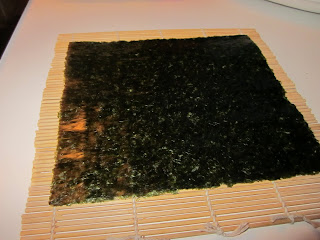
4. Lay the seaweed on the sushi mat rough side down. It's important that you have it the right way round as it's the rough side that you need for sticking the roll together.
seaweed on a rolling mat

5. Press the rice onto the seaweed leaving a strip at the top uncovered (you can see in the photo below). Then put a strip of fish along the bottom part of the rice.


6. Add a layer of vegetables.
Sushi ready to Roll


7. Carefully roll the sushi up using the matt...

Rolling sushi
Use the matt to roll but make sure you tuck the edge closest to you under
8. When you are ready to seal the roll, dunk your thumb in the egg cup full of vinegar and run it along the non-riced bit of the seaweed and then finish the roll.
Use your thumb to rub vinegar along the edge of the seaweed to seal the roll
9. Roll the... roll in the matt to make sure it's nice and tight and the put it on a chopping board and cut into rounds with a sharp knife. I can't stress how important it is to have a sharp knife for this so you can just cut straight through cleanly. Don't worry if the end rounds look scraggy - they're chef's perks!
Cutting the maki


10. Lay it all out on a platter - and any bits of fish that aren't the right size or shape for making maki we have as sashimi or handrolls.

Finished maki platter

11. Handrolls are pretty self explanatory - cup your hand and lay a rectangle of fish in your palm, using your finger rub a tiny bit of wasabi on the underneath of the fish and then press a rectangle of rice on top.

Rub a tiny amount of wasabi on the fish before squidging the rice on

I feel like I haven't explained all this as clearly as I would like but you will really get this if you try and of course you can use whatever vegetables and fish you would like. Just make sure they are great quality. You can also put some wasabi paste on the rice under the fish if you like but be careful as it can blow your mind and your taste buds.

SHARE:

18 June 2011

Frijolemole

I first had this quite recently even though it seems to have been around for a while and I have to say I had Sainsbury's Topped Frijolemole which is absolutely delicious and I highly recommend. However, I'm not one of those people who makes my own hummus, mostly because for some reason I just can't seem to do it, but also because you can get very good shop bought which leaves me free to be cooking something else. For some reason though I was really keen to try making the frijolemole myself... and so I did.

Having done some research it seems there is no specific way of making this and in fact you can add whatever you like it just means that it's a sort of mixture of beans really. I followed a pretty generic recipe from the Internet, wasn't very impressed so then used the cardboard list of ingredients from the back of the Sainsbury's packet to help me decide what to add. It worked pretty well, I was pleased with it but I think it will be one of those recipes that I constantly tweak every time I make it.

Frijolemole
Makes a medium size Tupperware box full

1 tin chickpeas
1 tin cannellini beans
1 tbsp olive oil
1 medium onion, chopped
2 garlic cloves, peeled
3 spring onions
1 red chili
2 tbsp lime juice
1 tomato, peeled and chopped
2 tbsp sour cream
2 tbsp mayonnaise
Ground cumin
2 slices jalapenos
Garlic puree
Ground coriander
sugar
1 tbsp fresh coriander, chopped
Flat leaf parsley, chopped
To peel a tomato drop it in a bowl of boiling water for half a minute

I do all of this in my magimix, you don't have to but I really recommend it. I also unrepentantly used jalapenos from a jar. They are absolutely fine.

1. Heat the oil over a medium heat and gently fry the onion for 5 minutes, then add the garlic and cook for a further 5 minutes.

2. Finley chop the spring onion and chili.
Chopped chili and spring onion

3. Drain the chick peas and cannellini beans and add to the food processor with the onion, garlic and any remaining oil in the pan. Add the lime juice, salt and pepper.
Onions and chickpeas in the blender

4. Blend to a rough puree.

5. From now on you want to blend as little as possible as it's still nice to have it with a bit of texture. Add the chili, spring onion, sour cream, mayonnaise, jalapeno slices and most of the fresh coriander. Blend again and taste.

6. Add a pinch of ground cumin, ground coriander, a squidge of garlic puree and a teaspoon on sugar. Whizz and taste. You can also add onion powder if you wish but do this before adding any more salt.

7. Add more jalapeno slices to make it more hot, sugar to sweeten etc until you are happy with the outcome. Tip into a bowl - I usually go straight for a Tupperware as this makes a lot and it's nice to have the toppings on every time you use it - and top with the chopped tomato, a drizzle of olive oil parsley and rest of the coriander.

frijolemole recipe


Serve this with crisps and a drink in the evening, or with bread, cheese and cold meats for a snack lunch.
SHARE:

15 June 2011

Leftover Bolognese Pancake Bake

So, what to do when you've had yummy bolognese or tortilla wraps and you have left over mince? Well sometimes I make quesadilla's but not if we've had tortilla's already - if that's the case I make a sort of pancake bake crossed with cannelloni. In fact you really could use cannelloni tubes if you have some hanging about in the cupboard but for this one we defrosted some pancakes and so really, apart from doing a bit of whisking with the white sauce, this couldn't have been an easier supper. You can assemble before hand and then just heat up when you need it which is also handy.

Leftover Bolognese Pancake Bake

Serves 4

Approx. 200g leftover bolognese (see Tortilla Wraps with Beef Mince)
4-6 pancakes (we used ready made ones but you can make your own)
Cheddar, grated
Parmesan, grated

For the white sauce:
40g butter
25g plain flour
425ml cold milk
grated nutmeg
salt and pepper

I used a reasonably small, rectangular oven proof dish for this and preheated the oven to 200C/400F/ Gas Mark 6.

1. Layout each pancake and fill with a large spoonful of the bolognese/mince. The amount of Bologna's you have leftover will dictate how much you use for each pancake... obviously.


2. Roll the pancakes up and put them seam-side down in the dish.


3. Now you can make the white sauce how you would like but for this one I just put the butter, flour and cold milk in a saucepan and whisk over a medium heat until the sauce bubbles and thickens. Reduce the heat right down and cook for 5 minutes to get rid of any floury taste and then season with the nutmeg, salt and pepper to taste.

4. Pour the white sauce over the pancakes and then sprinkle with the grated cheeses.

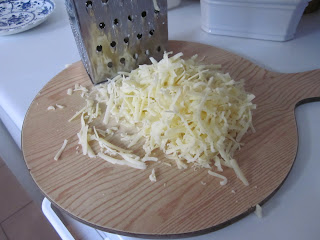
grated cheese
Grated Cheese
5. Bake for about 30 mins or until bubbling and golden. For a crispy top you can finish it under the grill quickly.
leftover bolognaise pancake bake
Finished pancake bake
SHARE:

11 June 2011

Elderflower Cordial

I know it's not really very technical but I think making Elderflower cordial is one of my favourite things to do. We use a recipe my mother has had for years and it turns out yummy every time. I try and make as many batches as possible in the short time the flowers are out and it's best to make this at the end of sunny day when the flowers are most fragrant. I find that this recipe usually makes 1.5litres of cordial and I like to use cordial bottles from Lakeland but you can just as well use well washed wine bottles.

elderflower picking
My sister and husband collecting the Elderflower
ELDERFLOWER CORDIAL


25 heads of Elderflower
40g citric acid
1 kg caster or granulated sugar
2 pints boiling water
1 lemon, sliced

Citric Acid 500g Pack is available online - I got mine from Amazon this year - you used to be able to get it from pharmacies. I'm not sure if that's still the case. You will need a large mixing bowls, your bottles, a sieve and a muslin or cloth to strain the cordial through.

1. Put the Elderflower heads in a large mixing bowl and add the sliced lemon, citric acid and sugar.
elderflowers, sugar and citric acid
Elderflower, lemons, sugar and citric acid

2. Pour over the boiling water and stir.

3. Once it's cooled cover with clingfilm and stir whenever you remember for the next three days.

Coridial after three days
4. When you are ready to bottle the cordial then sterilize the bottles (I pour boiling water in and tip out), and strain the cordial into a measuring jug through the sieve lined with muslin.

5. Tip the cordial into the bottles - if you have a steady hand then you won't need it but I use a funnel for this. I can't bear to waste a drop!

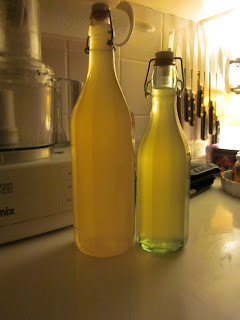
elderflower cordial
Finished Cordial
I find that every bottle lasts differently but in a dark cupboard this should keep for sometime - we usually get through ours pretty quick. Shop bought is all very well but there's nothing quite like homemade.
SHARE:

7 June 2011

Tortilla Wraps with Beef Mince

It seems a bit silly to be posting this as it seems pretty self explanatory BUT it is a really good recipe for this and it always goes down really well. You can prepare ahead, go to the pub and drink too much and then still have a yummy, fun supper when you get home. I like to do this on a Saturday night in the summer when I want to be outside drinking beer until the sun goes in. This is another of those hugely adaptable recipes but this is the way I do them.

TORTILLA WRAPS WITH BEEF MINCE
Makes 8 so serves 4-6 depending on appetites

8 tortilla wraps
1/2 onion, finely chopped
2 cloves of garlic, crushed
olive oil
500g lean beef mince
1 jar Dolmio bolognaise sauce (I know shock horror I'm using something pre-prepared... deal with it)
Sugar
Salt and Pepper

For the peppers and onions:
1 red pepper
1 1/2 yellow onion
1 tsp ground coriander
1 tsp ground cumin
1 tsp cayenne pepper

To serve:
Grated cheddar
Cucumber, cut into cubes
Sour Cream
Guacamole

Heat the oven to the temperature indicated on the tortilla wrap packet. I cook chop the onions and peppers first, cook the mince and then get on with the grating and chopping of everything else while it's cooking. I suppose I owe a bit of an explanation for using Dolmio - firstly it actually tastes good, and secondly it is part of what makes this recipe so easy - you can have Dolmio in the store cupboard and the mince and tortilla wraps in the freezer.

1. Chop an onion in half and dice one half of it and slice the remaining onion and a half into half moons. Cut the red pepper into strips, removing the stalk and seeds. Set the pepper and onion half-moons aside.

2. Heat some olive oil on a medium heat in a large frying pan and fry the diced half onion until soft. Add the finely chopped garlic and cook for another minute or so.

3. Add the mince to the frying pan and cook for 5-10 minutes until brown, stirring occasionally.

mince and onions

4. Add the Dolmio and simmer for 10 minutes stirring occasionally.

5. While the mince is cooking heat a couple of tablespoons of olive oil in a saucepan. Add the onion and peppers and herbs. Stir together and add salt and pepper.


Softening peppers and onions
6. Cook for five minutes or so until soft. Season to taste and set aside in a bowl keeping warm.

7. Dice the cucumber, grate the cheddar, decant the sour cream, guacamole and any other fillers you are using.

8. Heat the wraps as instructed (usually 200C for 8ish minutes wrapped in foil).

9. Add a dessertspoon of sugar to the mince and cook for a further five minutes. Put in a warm serving bowl.
Everything piled on

10. Pile it all on the table and let everyone help themselves!

Finished Wrap
SHARE:

Nicholas Nickleby - Charles Dickens

Finally finished Nicholas Nickleby (Vintage Classics) last night. It took me a month and 5 days to read which is the longest time ever and I am completely satisfied that I stuck with it even though a lot of people told me to give up (it's amazing how many people are a bit 'meh' about Dickens). Anyway, having never read any Dickens before I seem to have chosen one of the chunkier ones to kick off with but it was a really good read. What I would say was it needed a lot of editing. A lot. And I'm sure I'm not saying that just because I work in publishing but it's 830 pages and I think if it was submitted to a publisher now at least 200 of those would have been shaved off. I mean, they just didn't need to be there. I also did not find it as funny as I expected - I did smile on occasion and I was very pleased with the ending but not laugh out loud funny which a lot of people tell you is what they like about Dickens.

Definitely worth a read I'd say but be prepared - it's not a quickie.
SHARE:
© Blue Sky and Bunting. All rights reserved.
Blogger Templates by pipdig