22 September 2016

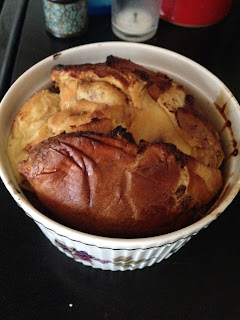
Chocolate Chip Brioche Pudding

I've lost count of the number of times I've vowed that my eldest (nearly 4) will eat less chocolate and yet he's so completely in it's thrall that I can get him to do pretty much anything for a chocolate croissant. I'm sure there are mothers out there who are stronger willed than I am but try as I might the mix of a biddable child and the sheer pleasure it gives him is just hard for me to resist. He's a fussy eater so to see him tucking into something new is wonderful, even if that new thing is chocolate brioche.

Choc Chip Brioche PuddingIn many ways the french have parenting sorted. Their baby food aisle isn't that big and the food unappealing to anyone over 18 months. If you have ever had pleasure from eating you are going to move on from the green sludgy puree as soon as you can waft past the cheese section (usually about three times bigger than the kids pouch aisle). They also do mini chocolate brioche's in pocket size individually wrapped so I can have bribery to hand wherever I go.

I packed as many of these as I could in my suitcase when we returned, only to discover a week later that their use by date had been the day the we got back. What to do? As an Englishwoman on the brink of Autumn I am filled with thriftiness. No food can be thrown out of my house at the moment. Yet, even I was going to draw the line at watching the little chap stuff in 5 mini chocolate brioche's in one sitting so I thought I'd create some sort of bread and butter pudding that he and his brother could have.
SHARE:

27 February 2015

Green & Blacks Organic Thin Bar

Send a pregnant woman an email asking if she'd like to try some chocolate for review and I think the majority would think like me 'say yes, eat the chocolate, worry about the review later'. If I get sent something and I don't like it, I email the nice person who sent it to me and say why I don't like it and then never hear from them again. This would be sad if it happened with chocolate but it was a risk I was willing to take. I had no need to worry the chocolate arrived and was delicious and better than anything from Green & Blacks I'd tried before. Big statement I know.
Thin Dark Chocolate 70%

Green & Blacks 70% Dark chocolate is the only plain chocolate I really like and the only one I would buy so I was totally thrilled to try the new Green & Blacks Thin 70% Dark Chocolate. The quality and taste of this is exactly the same but the new thin format is a big improvement. One or two squares is perfect with a mid-morning cup of coffee - really smooth and much more indulgent.

As for the whole new flavour Thin Salted Caramel, it is just the perfect side of sickly with the right amount of sea salt. At the beginning of the year when our cottage in Norfolk was finally finished and I spent a lot of time up there unpacking boxes of stuff that had been in my husbands family for decades and looked its age. A depressing and arduous task I took it upon myself to try every available milk chocolate/caramel/sea salt chocolate combination available in the North Norfolk area. I am qualified to tell you that this is the best I've tried.

Having been fairly disinterested in chocolate pre-babies I know find myself getting through bars of the stuff when pregnant (before this arrived an entire big bar of Galaxy went in over the course of one day. This is unheard of for me) - it's an annoying and expensive habit. With these new Thin bars I can have one or two squares and move on - that's the joy of the large flat squares, they last longer. You're not breaking off the next tiny square before you've finished the first mouthful. The Organic Thin Mint Crisp is exclusive to Waitrose until 2nd May and I will be getting a bar the next time I go there without a doubt. May even find an excuse to go out this afternoon.

They are £2.29 each, not the cheapest but great-tasting and seemingly long lasting. I've had these a week and they've survived the insatiable sweet-tooth of a pregnant lady. These new bars are absolutely worth a try. 

Thin Milk Chocolate with Salted Caramel


SHARE:

2 April 2014

Flourless Chocolate Cake

As a rule I generally run away from anything free-from, vegetarian or remotely specialist. Not that I don't like these things when I have them I have just grown-up in an omnivorous house where I was (am still am) mocked as being the fussy eater. So although I've seen recipes for flourless chocolate cakes around I've never tried one until my bff Florence casually dropped a slice round when we were in packing hell. Usually I would have made my husband eat it as I'm trying to lose weight but I absent mindedly broke the nose off the slice and nibbled it and it was absolutely amazing.

Cake pretty much leaves me cold (less so since having a baby) and chocolate cake doesn't excite me very much either. It's too cooked for me - if I'm going to have chocolate I want truffles or Dairy Milk or mousse, something smooth, and flourless chocolate cake is just that. It's incredibly rich, easy to make and the perfect thing to make for a decadent pudding when you don't have a lot of time.

Florence gave me this recipe taken from her friend so I can't claim it - this makes two cakes. I used one for my lunch party and have frozen the other but if you really want you could stick these together with cream, raspberries or even chocolate icing but I think one at a time dusted with icing sugar and served with double cream is the perfect way to eat this.

Flourless Chocolate Cake

Makes 2 cakes

360g dark chocolate (we use Bourneville), broken up
150g salted butter, roughly chopped into cubes
5 tbsp caster sugar
100g ground almonds
5 large eggs, separated

Pre-heat the oven to 180C/350F/Gas Mark 4. You will need two springform cake tins greased and lined.

1. Melt the chocolate and butter - ideally in a bowl over boiling water but in a microwave if not. When it's all melted together, remove from the heat stir in the ground almonds.

2. Beat the sugar and egg yolks until creamy and pale and stir into the chocolate mixture.

3. Whisk the egg whites until stiff and fold into the cake mixture.

4. Pour into the prepared cake tins and cook for 20 minutes but check after 15. These are best slightly undercooked rather than over, as they continue to cook a little as they cool.

5. Leave to cool in their tins for 15mins then on a cooling rack. Depending on which recipe you read you can either serve this still warm, completely cooled or even left over night. It's delicious no matter what you do.


SHARE:

3 March 2014

Cadbury's Headgehog Cake

One of my stand-out memories from my childhood is my mother making a chocolate hedgehog cake. Not only was it delicious but I was convinced she was some sort of genius kitchen witch. It seemed only fitting that when Ned turned one he should have hedgehog cake and I persuaded my mum to not only make one but three (he had two birthday parties obvs) and they were just as delicious as I remembered and perfect for a birthday because you end up cutting small slices so it goes a very long way.

When it was my nephew's first birthday a few weeks later it was I was in charge of making the cake so my mum sent me the recipe and I learnt the witchcraft for myself. The recipe is actually from Cadbury's and familiar to mum's everywhere but for those of you still convinced there are other forces involved here it is in it's easiest to follow form.

I would like to point out that my mum uses raisins for eyes, I didn't have raisins so I used marshmallows as suggested in the recipe. As you can see below my hedgehog looks a little scary but possibly suitable for those children with glasses...

Cadbury's Harriet Hedgehog

Serves a childrens party of 20-25 people

The cake:
175g margarine
175g caster sugar
3 eggs
150g self-raising flour
1 tsp baking powder
25g cocoa powder

Icing:
100g butter
175g icing sugar, sieved
1 tbsp cocoa powder

Decoration:
2 large packets of chocolate buttons
1 glace cherry
2 mini marshmallows, raisins or coffee beans

Pre-heat the oven to 180C/350F/Gas Mark 4. You will need an oven-proof basin, greased, that can hold 1.2litres/2 pints.

1. Cream the margarine and sugar together really well. Gradually beat in the eggs with a flour.

2. Sieve the flour, baking powder and cocoa powder together and fold in. Add a little milk to the mixture if it's too dry.

3. Turn into a prepared basin, smooth the top with a spatula and bake for about an hour. Test with a warm skewer to see if the cake is cooked in the center. Leave in the basin to cool and then turn it out.

4. Make the icing by beating the butter with the icing sugar. Dissolve the cocoa with a tiny amount of boiling water and mix into the butter icing.

5. Spread the flat top side of the cake with icing, then cut it in half down the middle and sandwich the two iced halves together.

6. Spread the icing all over the rest of the cake leaving a small amount to make the nose, lift onto a plate and use icing to form the snout at one end. Cut the chocolate buttons in half and arrange them as the hedgehog prickles. Make the face by dragging a fork along the icing, using the glace cherry as a nose and the raisins, marshmallows or coffee beans for eyes.

My chocolate hedgehog (pre-candles) with the 'glasses'

My mother's version for Ned

SHARE:

16 May 2013

Simple Chocolate Tart

I occasionally bite off more than I can chew but I'm becoming so grown-up now that I can now usually resist the urge to try to make three courses, look after the baby, tidy the house and do some writing all in the same day. For lunch yesterday this new regime manifested itself in the form of a shop-bought sweet shortcrust pastry tart base.

I never buy pastry unless it's puff, because I think it's a waste of money. It's not hard to make it and it's incredibly smug-making when you do and it goes really well but lunch with five adults, two toddlers, two babies and three dogs it seemed that maybe lovingly making a tart base was a bit too much. I didn't want to buy a pre-made pudding so I thought just the base was a good compromise. The filling was from The Naked Chef by Jamie Oliver which I've never cooked from before but I'd written a couple of recipes down ages ago and anything with the word simple in the title was going to ideal for yesterdays lunch.

I'm not that fussed about puddings but this was really delicious and actually the shop-bought base was perfect because it was drier than home made which went really well with the rich chocolate filling. I have quite a lot of chocolate left-over but I'm going to whip up some cream, stir it in and make some sort of chocolate mousse... I'll let you know how that goes.

Simple Chocolate Tart

1 sweet shortcrust pastry tart shell baked blind
315ml double cream
2 level tbsp caster sugar
the smallest pinch of salt
115g butter, softened
455g best-quality cooking chocolate (half milk half dark works well), broken up
100ml milk
cocoa powder for dusting

1. Place the double cream, sugar and salt into a pan and bring to the boil. As soon as the mixture has boiled remove from the heat add the butter and chocolate and stir until completely melted.

2. Allow the mixture to cool slightly, stirring in the milk until smooth and shiny.

3. Scrape into the pastry shell, shake gently to even it out and allow to cool for 1-2 hours until it is at room tempterature.

4. Dust with cocoa powder.


SHARE:

21 September 2012

Instant Chocolate Mousse

Although I don't really have a sweet tooth normally I am always a fan of chocolate mousse. Typical then that, now I'm pregnant and only want sweet things, chocolate mousse is often off the menu as it contains raw egg. Thank goodness (as usual) for Nigella Express which has this recipe in for an extra quick, egg free chocolate mousse. I can see this being a pretty permanent fixture in my fridge for the next 7 or so weeks. It seems to be really liquid when you decant it but once it's set in the fridge it has an amazing thickness. I like it best with a good dollop of double cream.

Instant Chocolate Mousse

For 4-6

150g mini marshmallows
50g soft butter
250g good dark chocolate (minimum 70% cocoa solids) chopped into small pieces
60ml hot water from a recently boiled kettle
1 x 284ml tub double cream
1 tsp vanilla extract

1. Put the marshmallows, butter, chocolate and water into a heavy-based saucepan.

2. Put the saucepan on the hob, over heat, though keep it fairly gentle, to melt the contents, stirring every now and again. Remove from the heat.

3. Meanwhile, whip the cream with the vanilla extract until thick, and then fold into the cooling chocolate mixture until you have a smooth cohesive mixture.

4. Pour or scrape into 4 glasses or ramekins, about 175ml each in capacity, or 6 smaller ones and chill until you want to eat.


SHARE:

19 July 2012

Devil's Food Cake

My sweet tooth continues to rage and having watched Nigella make this on tele the other night I decided to give it a go. It is delicious although I would advise cooking for 25 mins max (rather than the 30 she advises) so it's as gooey as possible. The top on mine was a bit hard and detracted someone from the vast amounts of icing on the rest of the cake! The recipe is in Kitchen: Recipes from the Heart of the Home (although I'm sure I was watching it on an older programme of hers). A little of this goes a long way as it's really rich - I think it would be extra nice with some double cream but for some that may be a step too far.

I've reorganised the way she does this so the icing comes first - I ended up having to put mine in the fridge as it was still too runny to spread on the cake after an hour and a half. 

Devil's Food Cake

For the cake:
50g best-quality cocoa powder, sifted
100g dark muscovado sugar
250ml boiling water
125g soft unsalted butter, plus some for greasing
150g caster sugar
225g plain flour
½ tsp baking powder
½ tsp bicarbonate of soda
2 tsp vanilla extract
2 eggs

For the frosting:
125ml water
30g dark muscovado sugar
175g unsalted butter, cubed
300g best-quality dark chocolate, finely chopped

Pre-heat the oven to 180C/350F/Gas Mark 4. Line the bottom of two 20cm sandwich tins (not springform or loose bottomed - this batter is very liquid) with baking parchment and butter the sides.

1.  Make the icing by putting 30g muscovdo sugar and 175g butter in a pan over a low heat to melt. When the mixture begins to bubble, take the pan off the heat and add the chopped chocolate, swirling the pan so that all the chocolate is hit with heat, then leave for a minute to melt before whisking till smooth and glossy.

2. Leave for at least an hour, whisking now and again when you are passing by the pan.

3. For the cake - put the cocoa and 100g dark muscovado sugar into a bowl with a bit of space to space, and pour in the boiling water. Whisk to mix, then set aside.

4. Cream the butter and caster sugar together, beating well until pale and fluffy. Nigella uses her freestanding kitchen aid mixer, I used my magimix, you can use either... or your arms!

4. While this is going on - or as soon as you stop if you are mixing by hand - stir the flour , baking powder and bicarb together in another bowl and set aside for a moment.

5. Dribble the vanilla extract into the creamed butter and sugar - mixing all the while - then drop in 1 egg, quickly followed by a scoopful of the flour mixture, then the second egg.

6. Keep mixing and incorporate the rest of the dried ingredients for the cake, then finally mix and fold in the cocoa mixture scraping the bowl well with a spatula.

7. Divide the batter between the two prepared tins and put in the oven for about 30 mins (I think 25 max) or until a skewer comes out clean when put through the middle of the cake.


8. Take the tins out and leave them on a wire rack for 5-10 mins, before turning the cakes out to cool.


9. Once the cakes are cool enough and the icing ready to spread, set one for the cooled cakes, with it's top side down, on a cake stand or plate (I use the lid of my cake tin so the tin itself can go over the top), spread with about a third of the icing, then top with the second cake, regular way up, and spread the remaining frosting over the top and sides. The cake should keep for 2-3 days in an airtight container in a cool place.


To make ahead: The cake layers can be baked 1 day ahead and assembled before serving: wrap tightly with clingfilm and store in an airtight container.

Freezing: Un-iced cake layers can be frozen on the day of baking, each wrapped in a double layer of clingfilm and a layer of foil for up to 3 months. Defrost for 3-4 hours on a wire rack at room temperature.
SHARE:

20 March 2012

Quick and Easy Chocolate Chip Cookies

I used to make these a lot at uni. Boys would turn up on my doorstep at 3am demanding that I make them and I haven't really made them since. But when my boss came to my flat for a meeting and wanted homemade cookies and my Hawaiian friend was on hand to eat most of the cookie dough so I didn't have to, I decided to dig out the old faithful recipe and give them a go.

The only problem was that the boss doesn't like dark chocolate really and there were no milk chocolate chips to be found so we bashed up some Minstrels and used those instead. I have to say I may just use them all the time in future - I don't really like cookies and I had two of these!

Chocolate Chip Cookies

Makes 20-30 cookies

300g plain flour
1/2 tsp bicarbonate of soda
1 tsp salt
170g butter, slightly softened
215g light brown sugar
1 tbsp Vanilla extract
1 large egg
1 large egg yolk
300g chocolate chips (or just under 2 large bags of minstrels)

Pre-heat the oven to 190C/375F/Gas Mark 5. You will need a couple of lined baking sheets - I prefer the reusable Teflon ones - two mixing bowls and a cooling rack.

1. Sift together the flour, bicarbonate of soda and salt and set aside.

2. Stir together the soft butter, sugar and Vanilla extract then add the egg and the yolk. Beat well to ensure the egg is evenly distributed.
 

3. If you are using Minstrels then wrap them in a clean teatowel and bash with a rolling pin - you don't want it to be too fine though. You could also pulse carefully in a Magimix.


Jo bashing up the Minstrels

4. Stir in the dry ingredients and then fold in the chocolate chips. It may be easier to do this by hand...

Mixing in the chocolate chips by hand
5. Form the dough into a rough sausage shape, cover in clingfilm and chill until firm - at least 30 minutes.

6. When the dough is ready, make hockey puck shapes and press onto the prepared baking tray.

7. Bake for approximately 10 minutes in the pre-heated oven until the edges begin to look golden.

8. Cool on the sheet for a minute then remove to a cooling rack.

Finished Cookies
SHARE:

12 December 2011

Simple Chocolate Mousse

I love this recipe - quick, easy and can be made ahead of time which is always helpful when you are having people for supper. I make them in little espresso cups and serve with double cream but you can use ramekins or make it in one big dish if you want.

Simple Chocolate Mousse

Serves 6-8

125g (4oz) dark chocolate
4 eggs
1 tbsp water

I've put serves 6-8 - it fills 6 espresso cups and one ramekin but if you were doing it in one dish and serving with other things this would definitely do 8.

1. Break up the chocolate and put in a bowl with the water. Melt the chocolate either in the microwave or by balancing the bowl over a saucepan of simmering water. I do the latter because you are guaranteed to get lovely smooth chocolate not sad burnt bits.


2. When the chocolate is melted remove the bowl from the saucepan and put to one side to cool.

3. Separate the eggs - putting the yolks is a small bowl for later and the whites in a mixing bowl big enough for whisking.

4. Add a pinch of salt to the egg whites and then whisk into soft peaks - I use my trusty electric hand whisk.

5. Beat the yolks and add to the cooled chocolate. Then, using a metal spoon, fold the whites into the chocolate mixture.


6. Spoon or pour into your chosen dish or cups and put in the fridge until you need them. These are nicest prepared in the morning and eaten the same day. They are fine the next day too though.

SHARE:

5 August 2011

Chocolate Butter Icing

This is an easy recipe but I thought it would be useful to have it separately. This makes enough icing to do the middle and top of a cake as long as you don't overdo either! This is really useful as you probably have everything you need in your cupboards and fridge.

CHOCOLATE BUTTER ICING

125g salted butter at room temperature
250g icing sugar
1 tbsp cocoa powder dissolved in 1 tbsp boiling water

It is really important that the butter is at room temperature or your arm is going to hurt and it's not going to blend together smoothly. You can use a mixer for this but frankly it'll take you longer to set it up and then wash it all than it will to make this by hand.

1. Beat together the butter, sugar and cocoa mix in a bowl with 1 tbsp boiling water.

2. When it's smooth, check the taste and then cover with clingfilm and chill until you want to use it.
SHARE:

Cockeyed Cake

This is an incredibly old recipe but it is by far and away the easiest chocolate cake to make. It takes 10 mins max to make and 30 mins or less in the oven. This is a particular favourite of mine for any last minute cake necessities and things that require all attendees to bring something along (I hate that normally...). The recipe I use is based on Peg Bracken's from The I Hate to Cook Book and is all measured in cups. I have done the conversion but left the cups in as that's what I use for this and it just adds to the ease.

The reason I'm making this cake tonight is that today is Mouse's (the dog's) birthday so tomorrow as some light relief in the office we are having traditional office tea and cake. I am making Mouse a peanut butter and carrot cake which is dog friendly but thought I can't really not make one for the human attendees and this is the obvious one to choose. This cake can be iced or not - this time I made butter icing because I didn't have enough plain chocolate and cream for ganache which is what I usually do. The one thing is to not ice this too early. The icing will slide off and you will be sad.

No don't freak out when you see the ingredients, it's unconventional but it works and it makes the best tasting batter ever.

COCKEYD CAKE

1 1/2 cups (340g/12 oz) plain flour
3 tbsp cocoa
1 tsp bicarbonate of soda
1 cup (226g/8 oz) sugar
1/2 tsp salt
5 tbsp cooking oil (I use sunflower oil)
1 tbsp vinegar
1 tsp vanilla extract
1 cup (240 ml) cold water

Pre-heat the oven to 180C/350F. I make this in an 8x4 inch loaf tin.

1. Sift the flour, cocoa, bicarbonate of soda, sugar and salt together into a large mixing bowl.

2. Tip in the cooking oil, vinegar, vanilla and cold water and mix together until it's nearly smooth and all the flour is mixed in. This feels like pretend cooking but it will work.


3. Tip into the greased tin and cook for 30ish minutes. I check mine after 25 but this time took the full 30.

4. Leave to cool in it's tin on a cooling rack for half an hour or so and then turn it out and leave to cool completely. Ice... or not.
SHARE:

10 July 2011

Fruit-free Fridge Cake

I'm not much of a cake fan, I don't really have a sweet tooth but I have always found fridge cake pretty irresistible. I have, however, never made it... until now. Lovely friends had brand spanking new baby and I didn't even have time to make my New Baby Brownies but I did want to take something homemade round that would be useful to give to all the visitors you inevitably have when you bring your baby home. This gave me the perfect excuse to make fridge cake and although I took a big box round to them I did keep 8 or so little slices for us as a treat. This is incredibly easy and versatile - you can use whatever you have in the cupboard and of course you can use fruit and nuts if you like but I think it's so incredibly decadent you should just go for it on the naughty front and keep the fruit for another time.


FRUIT-FREE FRIDGE CAKE
Makes 12 - 16 squares - depending on how you cut them

150g dark chocolate
150g milk chocolate
100g butter
150g golden syrup
250g digestive biscuits, crushed
2 Mars bars, chopped into cubes
2 regular sized bags Malteasers
A handful of mini marshmallows

You need a small-ish baking tin - I used my 8 x 8 inch one that I use for Turkish Delight - line it with clingfilm so that you have lots of overhang on each side.

1. Melt the chocolate, butter and golden syrup in a heatproof bowl over a pan of boiling water stirring occasionally.

2. When it has all melted together remove from the heat and stir in the biscuits, Mars bar, Malteasters and marshmallows.

3. Tip the whole lot into your cake tin and make sure it's in every corner and relatively smooth on top - a potato masher is good for this.

4. Cover the top with the overhanging clingfilm and put in the fridge until you need it or for at least 2 hours.

5. When you are ready to chop it up then you can use the clingfilm to maneuver it out of the tin. Then cut up with a sharp knife into the size squares you like. This is best kept in the fridge when you are not wanting it and lasts for ages.
Chopping up the fridge cake!
SHARE:

22 December 2010

Chocolate Peanut Butter Cups

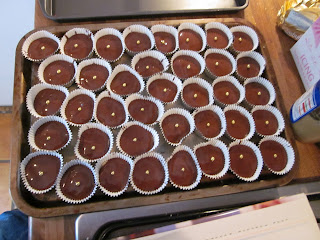
I love making canapes for parties. I often love it more than the party itself but, not having a sweet tooth, I sometimes feel like I let the side down rather when it comes to the non-savoury goodies. In fact, I never have any. This year whilst making mince pies I decided to push the boat out and attempt a festive sweet treat. I flicked through Nigella's Christmas - which I had been quite dismissive of until recently - and decided on trying out her Chocolate Peanut Butter Cups, mostly because Joe was practically licking the picture which is usually a good sign.

They were really easy to make, looked lovely and festive and went down a storm so here it is

NIGELLA LAWSON'S CHOCOLATE PEANUT-BUTTER CUPS
Makes approx 45

For the Base:
50g soft dark brown sugar
200g icing sugar
50g soft butter
200g smooth peanut butter

For the Topping:
200g milk chocolate, chopped
100g dark chocolate, chopped
edible gold buttons or stars (I used little balls that I found in the cook shop in Chiswick)

45-50 petit-four paper cases (I used silver ones, Nigella prefers gold)

1. Mix together the brown sugar, icing sugar, butter and peanut butter - you can either do this by hand, in a freestanding mixer or, like me, in the trusty magimix - until you've got a sandy paste.
The sandy peanut-butter mix

2. Using your hands form small 1 tsp discs to go in the bottom of the petit-four cases. Press the sandy mixture as best you can to form a layer at the bottom of each case. I started off a bit nervously with this and found that I had to go back and re-do some as I was being a bit mean!

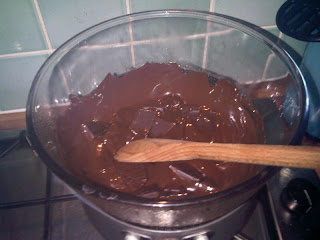
3. Melt the chocolates gently in a glass bowl over a pan of simmering water (make sure the bottom of the bowl is not touching the water). You can do this in a microwave if you are brave but I always burn the chocolate.

4. Stir the melted chocolates together and allow to cool a little and then spoon 1 tsp into each of the petit-four case covering the peanut-butter base. I found that I only just had enough to go round so I made 45 instead of Nigella's 48-50 but you can always whizz up some more chocolate so it's not a disaster if you do runout.

5. Decorate with your edible gold button or star or whatever of choice. Put in the fridge to set for 30 minutes or so before serving.

chocolate peanut butter cups
You can make these two days ahead and keep, loosely covered in a cool place. I made them on the day and although they were still yummy a couple of days after the chocolate was quite hard from being in the fridge. I was surprised at how easy and satisfying these were to make - minimum fuss, maximum result. Highly recommended.
SHARE:

3 December 2010

New Baby Brownies


I find it really hard to know what to get friends who have just had babies as they get loads of presents and some people are off some things and some people will only use one type of thing so I always try and bake something instead. New parents are likely to have lots of visitors so I think it probably helps to have baked goods to offer them, I also thing a quick sugar fix that can be eaten one handed is a must for nursing mothers! So in honour of little Lilly who was born on Tuesday here are my New Baby Brownies.

NEW BABY BROWNIES

Preheat the oven to 180C/356F/Gas Mark 4

300g caster sugar (I like to use golden caster sugar here but you don't have to)
250g butter
250g chocolate, broken into pieces and 50g put aside
3 large eggs and 1 extra egg yolk, beaten with a fork
60g plain flour
60g good quality cocoa powder
1/2 tsp baking powder
pinch of salt

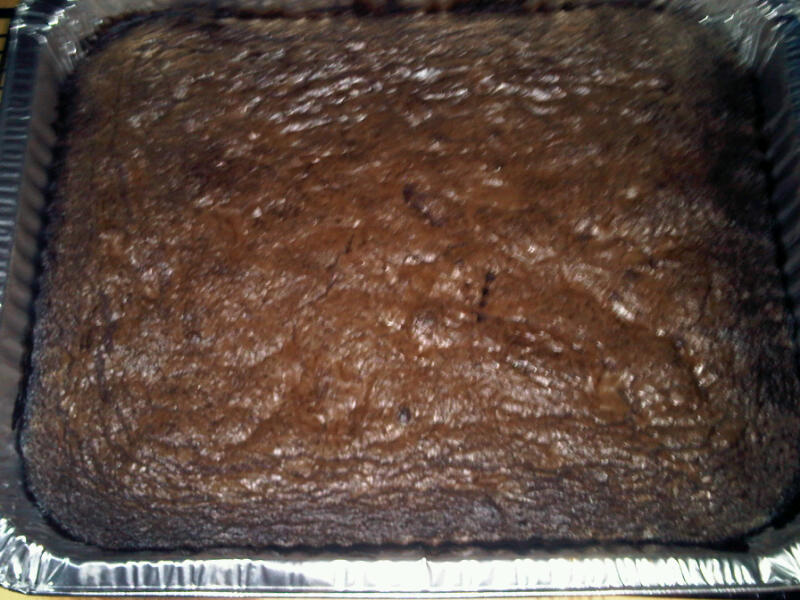
I make them in a disposable foil roasting tin because they never have to go anywhere else and when they're finished it can just be thrown away but any Swiss roll tin will do - the small it is the fatter they'll be and vice versa. If you are using a non-disposable Swiss roll tin then you'll need to line the bottom with baking paper.

1. Cream the butter and sugar together - ideally use a Kitchenaid as the mixer on this is ideal, I use my trusty Magimix but if you don't have either then do by hand. This needs to be really creamy though so be prepared for a bit of arm ache if you are doing it manually.

2. Melt the 200g of chocolate pieces in a bowl over a simmering pan of water (make sure the bottom of the bowl is not touching the water). Once the chocolate is melted then take it off the heat and stand to one side.
Melting chocolate
3. Sift together the flour, cocoa powder, baking powder and salt into a bowl.

Sifted flour and cocoa powder
Sifted dry ingredients
 
4. Slowly add the beaten eggs to the butter and sugar mixing in between additions. If you are using a kitchen aid then remove the bowl once all the eggs are added. I have a Magimix so I tip the mixture into a new mixing bowl.

 5. Break up the remaining 50g of chocolate into small pieces. I do this by putting them in a freezer bag and bashing them with a rolling pin. Very satisfying but slightly annoying for our upstairs neighbours. Add the melted chocolate and chocolate pieces to the butter/sugar/egg mix, folding them in with a metal spoon.
Post-chocolate, pre-flour
6. Finally fold in the dry ingredients - try to be gentle as you don't want to knock all the air out.


7. Pour the mixture into your tin, smooth the top and put in the oven for about 25-30mins. Brownies continue to cook as they cool so you want them to be cooked enough so that a skewer comes out sticky but not covered in raw ingredients when poked in the centre.

8. Leave to cool on a rack in their tin for at least an hour before removing them or cutting them into their squares. If you are being fancy schmancy you can dust with icing sugar. But I never do.
Chocoloate brownies 

SHARE:
© Blue Sky and Bunting. All rights reserved.
Blogger Templates by pipdig