20 March 2012

Quick and Easy Chocolate Chip Cookies

I used to make these a lot at uni. Boys would turn up on my doorstep at 3am demanding that I make them and I haven't really made them since. But when my boss came to my flat for a meeting and wanted homemade cookies and my Hawaiian friend was on hand to eat most of the cookie dough so I didn't have to, I decided to dig out the old faithful recipe and give them a go.

The only problem was that the boss doesn't like dark chocolate really and there were no milk chocolate chips to be found so we bashed up some Minstrels and used those instead. I have to say I may just use them all the time in future - I don't really like cookies and I had two of these!

Chocolate Chip Cookies

Makes 20-30 cookies

300g plain flour
1/2 tsp bicarbonate of soda
1 tsp salt
170g butter, slightly softened
215g light brown sugar
1 tbsp Vanilla extract
1 large egg
1 large egg yolk
300g chocolate chips (or just under 2 large bags of minstrels)

Pre-heat the oven to 190C/375F/Gas Mark 5. You will need a couple of lined baking sheets - I prefer the reusable Teflon ones - two mixing bowls and a cooling rack.

1. Sift together the flour, bicarbonate of soda and salt and set aside.

2. Stir together the soft butter, sugar and Vanilla extract then add the egg and the yolk. Beat well to ensure the egg is evenly distributed.
 

3. If you are using Minstrels then wrap them in a clean teatowel and bash with a rolling pin - you don't want it to be too fine though. You could also pulse carefully in a Magimix.


Jo bashing up the Minstrels

4. Stir in the dry ingredients and then fold in the chocolate chips. It may be easier to do this by hand...

Mixing in the chocolate chips by hand
5. Form the dough into a rough sausage shape, cover in clingfilm and chill until firm - at least 30 minutes.

6. When the dough is ready, make hockey puck shapes and press onto the prepared baking tray.

7. Bake for approximately 10 minutes in the pre-heated oven until the edges begin to look golden.

8. Cool on the sheet for a minute then remove to a cooling rack.

Finished Cookies
SHARE:

14 January 2012

Vietnamese Pork Noodle Soup

Another one of Joe's choices for this weeks big shop. It was incredibly easy to make, soothing and tasty. I think next time I make it I may tweak it a little - I felt the broth was missing a little something that I can't put my finger on at the moment. Not that this should deter you from trying this recipe out and maybe you will let me know what you think if you do.

This comes from Kitchen: Recipes from the Heart of the Home - I still feel like I've only scratched the surface of what this book has to offer. What I love about this recipe is the use of pork fillet, which I have to confess to never using before. I'm not a huge pork fan but this was tasty and easy and really cheap compared to my usual beef. £4 something for nearly 500g so I cut it all into strips and put the remaining bits in freezer bag ready for the next batch of this. I think next time I will probably use straight-to-wok noodles and add them to the soup in the wok rather than cooking noodles separately.

Vietnamese Pork Noodle Soup

Serves 4

275g pork fillet, cut into thin discs and then fine strips
2 tbsp lime juice
2 tbs soy sauce
1/2 tsp paprika
2 tbsp fish sauce
250g ramen noodles
1 tbsp garlic oil
6 thin or 3 fat spring onions, finely sliced
1 tbsp chopped fresh ginger
1 litre chicken stock
300g beansprouts
175g baby pak choi, torn into pieces
2 tsps chopped red chili

All you need for this (apart from a chopping board and a sharp knife) is a saucepan to cook the noodles in and a wok or deep heavy-based frying pan. I'd advise doing all the chopping and weighing out of ingredients first then cooking the soup itself will be a matter of minutes.

1. Put the strips of pork fillet into a bowl and add the lime juice, soy sauce, paprika and fish sauce, but don't let this stand for more than 15 minutes.

2. Cook the noodles according to packet instructions and then refresh in cold water.

3. Heat a wok then add the garlic oil and fry the spring onions and ginger for a minute or so. Add the pork and its liquid to the wok, stirring as you go.

4. Cook the meat in the pan for another two minutes, then make up the chicken stock with boiling water, add the hot stock to the pan and bring to the boil.

5. Check the pork is cooked through, then add the beansprouts and baby pak choi. Add water if the soupy base has evaporated too much - about 125ml of freshly boiled water should do the trick, but you may not need it.

6. Arrange the drained noodles equally in warmed bowls, ladle over the pork and vegetables and finally the soupy stock. Scatter the chopped chili on top and serve.

Finished soup (without the red chilli)
SHARE:

1 August 2011

Rachel Allen's Ginger and Honey Snaps

Yet another tasty and easy recipe from Bake although I did make some amendments throughout - as always. When I was off on the sponsored ride I needed to take something to each of the three places I was staying as a thank you present and I thought home made biscuits would be quite nice. I'm a real sucker for ginger biscuits even though on the whole I'm not a huge biscuit fan so I've been desperate for an excuse to make these since I got the book.

I think if you followed the recipe exactly you get sort of cookie size biscuits which was fine but I wanted something a little smaller so rather than the 20 biscuits I got about 40. If you'd rather have smaller biscuits then roll the dough smaller than a walnut - they need to be really small as they grow quite a lot in the oven.

Ginger and Honey Snaps

Makes about 20 cookie size or 40 smaller

225g self-raising flour
2 tsp bicarbonate of soda
a pinch of salt
1 tsp ground ginger
1 tsp mixed spice
1/2 tsp ground cinnamon
100g caster sugar
125g butter, cold and cubed
100g (approx 7 tbsp) runny honey

Pre-heat the oven to 180C/350F/Gas Mark 4. The recipe says 1 large baking sheet but I use two and alternate them. These are quick cooking biscuits so you can be making up a tray while one cooks... and I don't have a large baking sheet anyway (snivel). I use a re-usable baking sheet but you can grease the tins with vegetable oil if you prefer. It's also useful to have a measuring jug with water in it and fork resting in it - you need a damp fork to shape the biscuits and it's good to get this ready before your hands get all doughy.

1. Sift the flour, bicarbonate of soda, salt and spices into a large mixing bowl - add the sugar and mix well.

2. Rub the butter into the flour and spices, using your fingers, until the mixture resembles breadcrumbs.

3. Heat the honey gently in a small saucepan, then pour into the flour using a wooden spoon to mix it altogether.


4. Sprinkle 1 tbsp of caster sugar on a side plate and then, using floured hands, roll the dough into small balls, roll in the caster sugar and then place on the prepared baking sheet. They need quite a bit of room on the sheet as they will expand.


5. Using a damp fork flatten the balls to make biscuit shapes and bake in the oven for 7-10 minutes. My oven blows hot so these actually took just under 7 minutes. You really want these to be just golden brown. If they are too dark they will taste bitter.

6. Leave on the baking tray for two minutes before carefully transferring to a wire cooling wrack.

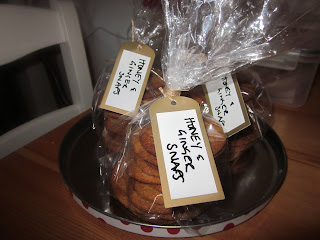
Rachel Allen's Honey and Ginger Snaps


You can make the dough a couple of days ahead, roll into a sausage, cover with cling film and keep in the fridge. When you want to make the cookies chop a slice off the sausage and roll as above.
SHARE:

10 July 2011

Fruit-free Fridge Cake

I'm not much of a cake fan, I don't really have a sweet tooth but I have always found fridge cake pretty irresistible. I have, however, never made it... until now. Lovely friends had brand spanking new baby and I didn't even have time to make my New Baby Brownies but I did want to take something homemade round that would be useful to give to all the visitors you inevitably have when you bring your baby home. This gave me the perfect excuse to make fridge cake and although I took a big box round to them I did keep 8 or so little slices for us as a treat. This is incredibly easy and versatile - you can use whatever you have in the cupboard and of course you can use fruit and nuts if you like but I think it's so incredibly decadent you should just go for it on the naughty front and keep the fruit for another time.


FRUIT-FREE FRIDGE CAKE
Makes 12 - 16 squares - depending on how you cut them

150g dark chocolate
150g milk chocolate
100g butter
150g golden syrup
250g digestive biscuits, crushed
2 Mars bars, chopped into cubes
2 regular sized bags Malteasers
A handful of mini marshmallows

You need a small-ish baking tin - I used my 8 x 8 inch one that I use for Turkish Delight - line it with clingfilm so that you have lots of overhang on each side.

1. Melt the chocolate, butter and golden syrup in a heatproof bowl over a pan of boiling water stirring occasionally.

2. When it has all melted together remove from the heat and stir in the biscuits, Mars bar, Malteasters and marshmallows.

3. Tip the whole lot into your cake tin and make sure it's in every corner and relatively smooth on top - a potato masher is good for this.

4. Cover the top with the overhanging clingfilm and put in the fridge until you need it or for at least 2 hours.

5. When you are ready to chop it up then you can use the clingfilm to maneuver it out of the tin. Then cut up with a sharp knife into the size squares you like. This is best kept in the fridge when you are not wanting it and lasts for ages.
Chopping up the fridge cake!
SHARE:

5 June 2011

Dark Chocolate Ginger Squares


This is based on Claire MacDonald's recipe in A Salute to Cooking but she adds pistachio nuts which I'll put here as optional - I don't add them because I think they're nicer plainer. This is really easy and I actually made it because I was sad and wanted to cook but use things that I had in the cupboard already and I've had a jar of stem ginger hanging around for ages so I finally got to use some.This is a particularly easy recipe because it's basically just melting and stirring.

Dark Chocolate Ginger Squares

Makes about 20 squares

225g (8 oz) butter, cut into cubes
225g (8 oz) dark chocolate broken into bits
2 large egg yolks
225g (8 oz) ginger biscuits, crumbed
3 tablespoons ginger wine
8 pieces stem ginger, drained and sliced finely

Claire uses 120g (4 oz) toasted pistachio's which I leave out. I use Stone's ginger wine but any will do. Butter a brownie tin and line the bottom with baking paper.

1.  Put the biscuits in a sturdy plastic freezer bag and bash with a rolling pin. You can use a magimix if you want but it'll be less therapeutic. Tip into a big mixing bowl.
Crumbed Biscuits

2. Thoroughly mix the ginger wine in with the biscuit crumbs.

3. Melt the chocolate and butter together over a gentle heat in a heavy based saucepan. Stir together until it is thick and glossy.

4. Beat the egg yolks into the hot chocolate and butter mixture.

5. Mix the ginger biscuit crumbs, and the pistachio's if you are using them, and half the stem ginger into the chocolate mixture. Stir thoroughly.

6. Pour the mixture into the prepared tin so it's smooth and even. Leave to set.

7. When it's mostly set scatter the remaining stem ginger over the top and cut into squares.
Dark chocolate ginger squares
Finished Dark Chocolate Ginger Squares

SHARE:

10 April 2011

Rachel Allen's Peanut Butter and White Chocolate Blondies

For mothers day my sister and I hosted a lunch for my parents at my flat - we ordered in sushi (from Feng Sushi) and went for a walk in Ravenscourt Park. It was actually pretty nice weather and having assumed it would not be I had persuaded my mother to bring wellies so we strode about the park in the sun feeling like we had got lost on a countryside ramble. We had also decided to do cream tea for when we returned and my penchant for over feeding reared it's ugly head and so I made Rachel Allen's Peanut Butter and White Chocolate Blondies. Now I don't like white chocolate so I didn't try one but I think these went even quicker than brownies... a few were eaten at tea and then Joe took them to work the next day. I don't think they made it to lunch time - always a good sign I think. Highly recommended if you want too cook something easy, yummy and not brownies! This recipe is taken from Bake - a book I'm more and more in love with every time I use it.

Rachel Allen's Peanut Butter and White Chocolate Blondies

Makes 12 squares

125g plain flour
1 tsp baking powder
100g butter, softened
150g crunchy peanut butter
175g soft light brown sugar
1 egg, beaten
1 tsp vanilla extract
75g white chocolate, chopped

Pre-heat the oven to 170C/325F/Gas Mark 3 and line and grease a 20x20cm square cake tin. I softened my butter for 10 seconds in the microwave but if you're clever you can just take it out of the fridge a bit before you want to cook. I used a milky bar for the white chocolate - it was impossible to find an alternative within a 1 mile radius of my flat!

1. Sift the flour and baking powder into a small bowl and set aside.

2. In a large bowl, cream the butter and peanut butter together until very soft. Add the sugar, egg and vanilla extract and beat until combined. Add the flour, baking powder and the chopped chocolate and mix to form a dough.

3. Place the dough in the prepared tin and bake in the oven for 25-30 mins or until golden brown and almost firm in the centre.
Blondie dough

4. Allow to cool in the tin, before removing and cutting into squares*.

*As with brownies I actually find it easier and less messy to cut these in the tin and then using a small spatula to ease them out.
Blondies
Finished Blondies in their tin
SHARE:

28 March 2011

Cheese Cows

Now I am in no way an animal fascist. You can make these in any animal shape you want or indeed any shape you like. This is not really a 'traditional' cheese straw recipe - which I do in either straw or star shape. For this recipe I like animals though - I have pig, cow and elephant... I want more. I want a whole zoo. Anyway, that's not the point. This is a really easy recipe that's yummy and rather addictively tasty.

UPDATE 2017: these are my most requested treat. For every kids party, christmas party, in face any event I get asked to make these.

CHEESE COWS
Makes approx 25 cows

Pre-heat the oven to 180C/355F/Gas Mark 4.

170g (60z) mature cheddar, coarsely grated
60g butter
95g plain flour
1/8 tsp onion powder
1/8 tsp table salt

Pre-heat the oven to 170C/350F/Gas Mark 4. You'll need a food processor (unless you want sore arms), a large baking sheet (or a couple of small ones if you are like me and can never find a suitable big one), and a cooling rack. I only mention it because I only remember I need one when I'm holding the hot baking tray in my hands. You can add more or less of the onion powder as you wish but increase/decrease the salt accordingly as the onion powder is salty itself.

1. Put all the ingredients together in the mixer and blend until it forms a dough. About two minutes.

2. Wrap the dough ball in cling film and refrigerate for half an hour. This makes it much more manageable when you are rolling it and cutting out your shapes later.
Dough ready to be rolled

3. Lightly flour a surface or board and your rolling pin and roll the dough out until it's reasonably thin (about 3mm). Cut your shapes out with the cutter of choice. It's easiest if you flour the cutter in-between using a small plate of flour but I am usually too lazy to do this.

4. Put the shapes onto a lined baking tray. These go up rather than out so they can be quite close together. I got a bit carried away and used a skewer to make eyes but you really don't have to do that.

Cows ready for the oven
5. Bake in the oven for 12-15 mins. Check after 10 though - my oven is quite hot. They need to be browned at the edges although of course it is up to you how cooked they are.
Cooling Cows

6. Put on a rack to cool. And then into a tin to keep them fresh.


7.Try not to eat them all yourself. Although obviously you can if you want.
SHARE:

3 December 2010

New Baby Brownies


I find it really hard to know what to get friends who have just had babies as they get loads of presents and some people are off some things and some people will only use one type of thing so I always try and bake something instead. New parents are likely to have lots of visitors so I think it probably helps to have baked goods to offer them, I also thing a quick sugar fix that can be eaten one handed is a must for nursing mothers! So in honour of little Lilly who was born on Tuesday here are my New Baby Brownies.

NEW BABY BROWNIES

Preheat the oven to 180C/356F/Gas Mark 4

300g caster sugar (I like to use golden caster sugar here but you don't have to)
250g butter
250g chocolate, broken into pieces and 50g put aside
3 large eggs and 1 extra egg yolk, beaten with a fork
60g plain flour
60g good quality cocoa powder
1/2 tsp baking powder
pinch of salt

I make them in a disposable foil roasting tin because they never have to go anywhere else and when they're finished it can just be thrown away but any Swiss roll tin will do - the small it is the fatter they'll be and vice versa. If you are using a non-disposable Swiss roll tin then you'll need to line the bottom with baking paper.

1. Cream the butter and sugar together - ideally use a Kitchenaid as the mixer on this is ideal, I use my trusty Magimix but if you don't have either then do by hand. This needs to be really creamy though so be prepared for a bit of arm ache if you are doing it manually.

2. Melt the 200g of chocolate pieces in a bowl over a simmering pan of water (make sure the bottom of the bowl is not touching the water). Once the chocolate is melted then take it off the heat and stand to one side.
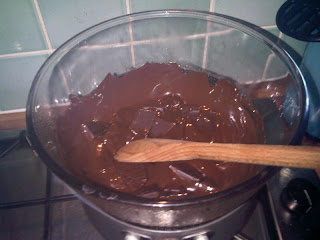
Melting chocolate
3. Sift together the flour, cocoa powder, baking powder and salt into a bowl.

Sifted flour and cocoa powder
Sifted dry ingredients
 
4. Slowly add the beaten eggs to the butter and sugar mixing in between additions. If you are using a kitchen aid then remove the bowl once all the eggs are added. I have a Magimix so I tip the mixture into a new mixing bowl.

 5. Break up the remaining 50g of chocolate into small pieces. I do this by putting them in a freezer bag and bashing them with a rolling pin. Very satisfying but slightly annoying for our upstairs neighbours. Add the melted chocolate and chocolate pieces to the butter/sugar/egg mix, folding them in with a metal spoon.
Post-chocolate, pre-flour
6. Finally fold in the dry ingredients - try to be gentle as you don't want to knock all the air out.


7. Pour the mixture into your tin, smooth the top and put in the oven for about 25-30mins. Brownies continue to cook as they cool so you want them to be cooked enough so that a skewer comes out sticky but not covered in raw ingredients when poked in the centre.

8. Leave to cool on a rack in their tin for at least an hour before removing them or cutting them into their squares. If you are being fancy schmancy you can dust with icing sugar. But I never do.
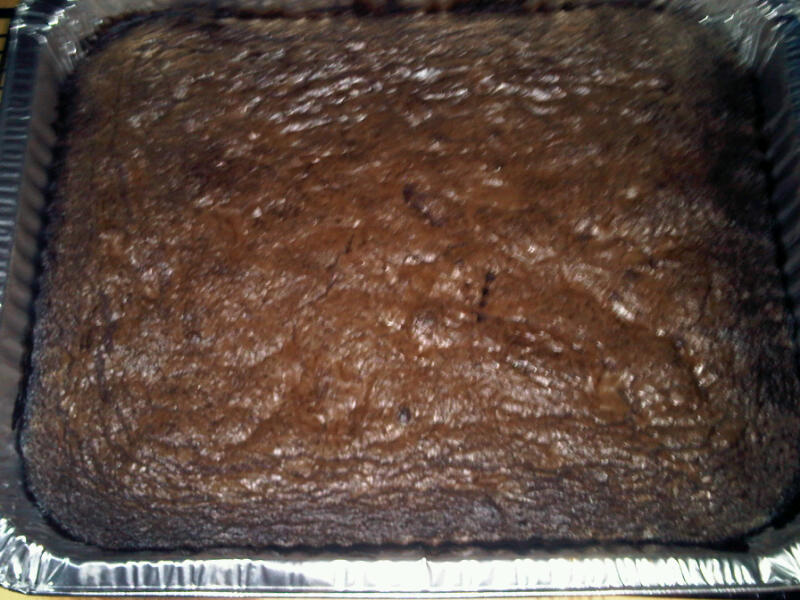
Chocoloate brownies 

SHARE:
© Blue Sky and Bunting. All rights reserved.
Blogger Templates by pipdig