We called the drop scones... it gets a bit confusing. Whatever they are my boys LOVE them. That's because they contain some sugar which I never realised until I had one last week having not tasted them since I was about 8. I have happy memories of my mum making us these and, of course, wanted my children to have the same, so I turned to my newest treasured possession, my mother-in-laws much-annotated Constance Spry cookery book and found her version.
My sister said these were the best she'd ever had which was nice of her, I was a bit panicked as I didn't have any baking powder so I left that out and they were absolutely fine. I've left the baking powder in the recipe below but I made them again with the baking powder and and they were exactly the same.
I melted some butter in a mug to brush on the bottom of my mini sauce pan. These are a bit more faff than a regular pancake but for tea time they are perfect. These also have a lot less sugar than the bought ones...
Scotch Pancakes
Makes about 15 drop scones
225g flour
½ tsp bicarbonate of soda
½ tsp cream of tartar
½ tsp baking-powder
1 tbsp syrup
a nut of butter
1 tbsp sugar
1 egg
½ pint fresh milk (approx)
I melt some butter in a mug in the microwave so I can brush it on the frying pan for speed. I use a small frying pan for this and a serving spoon seems to give about the right amount of batter.
1. Mix all the dry ingredients, rub in the butter and add the syrup.
2. Add half the milk, mixing well iwth a wooden spoon, then break in the egg, beat well and add the remaining milk.
3. The mixture should just drop from the spoon (HENCE THE NAME YOU SEE!!!)
4. Allow to stand for 10-15 minutes, no longer.
5. Heat a well-greased pan and when really hot drop the mixture in spoonfuls and bake for about 3 minutes on each side until golden brown (they get quicker each time).
To keep the scones warm and soft wrap in a clean cloth. These are fine re-heated in the toaster the next day.
13 April 2016

3 March 2014
Cadbury's Headgehog Cake
One of my stand-out memories from my childhood is my mother making a chocolate hedgehog cake. Not only was it delicious but I was convinced she was some sort of genius kitchen witch. It seemed only fitting that when Ned turned one he should have hedgehog cake and I persuaded my mum to not only make one but three (he had two birthday parties obvs) and they were just as delicious as I remembered and perfect for a birthday because you end up cutting small slices so it goes a very long way.
When it was my nephew's first birthday a few weeks later it was I was in charge of making the cake so my mum sent me the recipe and I learnt the witchcraft for myself. The recipe is actually from Cadbury's and familiar to mum's everywhere but for those of you still convinced there are other forces involved here it is in it's easiest to follow form.
I would like to point out that my mum uses raisins for eyes, I didn't have raisins so I used marshmallows as suggested in the recipe. As you can see below my hedgehog looks a little scary but possibly suitable for those children with glasses...
Cadbury's Harriet Hedgehog
Serves a childrens party of 20-25 people
The cake:
175g margarine
175g caster sugar
3 eggs
150g self-raising flour
1 tsp baking powder
25g cocoa powder
Icing:
100g butter
175g icing sugar, sieved
1 tbsp cocoa powder
Decoration:
2 large packets of chocolate buttons
1 glace cherry
2 mini marshmallows, raisins or coffee beans
Pre-heat the oven to 180C/350F/Gas Mark 4. You will need an oven-proof basin, greased, that can hold 1.2litres/2 pints.
1. Cream the margarine and sugar together really well. Gradually beat in the eggs with a flour.
2. Sieve the flour, baking powder and cocoa powder together and fold in. Add a little milk to the mixture if it's too dry.
3. Turn into a prepared basin, smooth the top with a spatula and bake for about an hour. Test with a warm skewer to see if the cake is cooked in the center. Leave in the basin to cool and then turn it out.
4. Make the icing by beating the butter with the icing sugar. Dissolve the cocoa with a tiny amount of boiling water and mix into the butter icing.
5. Spread the flat top side of the cake with icing, then cut it in half down the middle and sandwich the two iced halves together.
6. Spread the icing all over the rest of the cake leaving a small amount to make the nose, lift onto a plate and use icing to form the snout at one end. Cut the chocolate buttons in half and arrange them as the hedgehog prickles. Make the face by dragging a fork along the icing, using the glace cherry as a nose and the raisins, marshmallows or coffee beans for eyes.
 |
| My chocolate hedgehog (pre-candles) with the 'glasses' |
 |
| My mother's version for Ned |
18 October 2012
The Ultimate Coffee Cake
I had to work on my birthday for the first time ever this year. Typically I've avoided being at school or work for the first 28 and then when I'm finally free from the office and working for myself I manage to land a 12 hour day. I'm not complaining as it was doing makeup on a film set so it was really fun but pretty exhausting when you are 6 ½ months pregnant. I was tired when I drove home but got back to a spankingly clean house, champagne in the fridge and my family there with lots of presents and ready to order me illicit sushi. As I didn't get home til 8 I assumed that I'd missed the cake slot but no, my Mumma had not only made me a cake but it turned out to be actually the best cake in the whole world.
Now I admit that I am one of those people who thinks their mother's cooking is the best (I know my mum's cooking is the best) and her coffee cake, which she has made me for pretty much every birthday for the last 29 years is unbeatable, but this year's took it to a whole other level. I know that a lot of people don't like coffee cake - that is because most shop bought cakes a) come with walnuts (why? WHY?) and b) are incredibly sickly because they use too much coffee but this cake has, so far, gone down well with everyone. This cake is really moist (I think because it uses margarine instead of butter... sounds gross but trust me it works) and has not too much coffee in the sponge or the icing and instead of walnuts either grated chocolate or just sprinkled with caster sugar. If you want to be as amazing as my mother's, topped with extra coffee icing and sprinkled with crumbled flake.
This cake was so good I had to cut it into individual slices and freeze them to stop me eating it all in one sitting. So she gave me the recipe and here it is... I should have take photos of my birthday cake as it was amazing but as I said it didn't last long so you'll have to make do with pictures of my less beautiful attempt. If you do want icing on the top and bottom then make double the amount of icing.
The Ultimate Coffee Cake
For the sponge:
100g soft margarine
150g self-raising flour
1 tsp baking powder
150g caster sugar
2 large eggs
4 tbsp milk
1-2 tsp Camp coffee
For the icing:
200g icing sugar
85g butter
Camp coffee
Pre-heat the oven 180C/350F. I make all of this in a Magimix and use whatever size cake tin I feel like which I know isn't very helpful but I make one cake and chop it in half to ice it so I don't need two tins the same size. It needs to be lined on the bottom.
1. Put all the sponge ingredients into a Magimix (or food processor... or do it by hand) and blitz for 10 seconds.
2. Scrape round the edges of the Magimix bowl with a spatula and blend again for another 5 seconds.
3. Pour into your prepared cake tin and cook in the oven for 25-30 minutes until golden on top and a skewer poked into the middle comes out clean
4. While the cake is cooking wash and clean the Magimix and then make the icing.
5. Put the icing sugar and butter into the clean Magimix and whizz until smooth. Add Camp coffee to taste, blending to mix thoroughly.
6. When the cake is cooled enough remove it from the tin. Leave to stand for 10 minutes and then cut in half with a bread knife.
7. When the cake is completely cooled layer one half with icing and then add the other half as the top. Then ice, sugar or grate chocolate onto the top.
8. I quite like this cake to be kept in the fridge and then removed 5-10 mins before I have a slice but it's perfectly happy in a cake tin.
Now I admit that I am one of those people who thinks their mother's cooking is the best (I know my mum's cooking is the best) and her coffee cake, which she has made me for pretty much every birthday for the last 29 years is unbeatable, but this year's took it to a whole other level. I know that a lot of people don't like coffee cake - that is because most shop bought cakes a) come with walnuts (why? WHY?) and b) are incredibly sickly because they use too much coffee but this cake has, so far, gone down well with everyone. This cake is really moist (I think because it uses margarine instead of butter... sounds gross but trust me it works) and has not too much coffee in the sponge or the icing and instead of walnuts either grated chocolate or just sprinkled with caster sugar. If you want to be as amazing as my mother's, topped with extra coffee icing and sprinkled with crumbled flake.
This cake was so good I had to cut it into individual slices and freeze them to stop me eating it all in one sitting. So she gave me the recipe and here it is... I should have take photos of my birthday cake as it was amazing but as I said it didn't last long so you'll have to make do with pictures of my less beautiful attempt. If you do want icing on the top and bottom then make double the amount of icing.
The Ultimate Coffee Cake
For the sponge:
100g soft margarine
150g self-raising flour
1 tsp baking powder
150g caster sugar
2 large eggs
4 tbsp milk
1-2 tsp Camp coffee
For the icing:
200g icing sugar
85g butter
Camp coffee
Pre-heat the oven 180C/350F. I make all of this in a Magimix and use whatever size cake tin I feel like which I know isn't very helpful but I make one cake and chop it in half to ice it so I don't need two tins the same size. It needs to be lined on the bottom.
1. Put all the sponge ingredients into a Magimix (or food processor... or do it by hand) and blitz for 10 seconds.
2. Scrape round the edges of the Magimix bowl with a spatula and blend again for another 5 seconds.
3. Pour into your prepared cake tin and cook in the oven for 25-30 minutes until golden on top and a skewer poked into the middle comes out clean
 |
| Cake batter |
4. While the cake is cooking wash and clean the Magimix and then make the icing.
 |
| Cake cooling |
5. Put the icing sugar and butter into the clean Magimix and whizz until smooth. Add Camp coffee to taste, blending to mix thoroughly.
6. When the cake is cooled enough remove it from the tin. Leave to stand for 10 minutes and then cut in half with a bread knife.
7. When the cake is completely cooled layer one half with icing and then add the other half as the top. Then ice, sugar or grate chocolate onto the top.
8. I quite like this cake to be kept in the fridge and then removed 5-10 mins before I have a slice but it's perfectly happy in a cake tin.
 |
| Definitely not my most beautiful cake but my god it tasted good |
31 August 2012
Afternoon Tea - No 2 Browns Hotel
A proper afternoon tea in London doesn't come cheap but then if it was something you could have everyday would it be as special? Probably not. Round two of my 'Afternoon Tea Tour' with my friend Catherine, the undisputed Queen of Afternoon Tea, and she took me to Browns Hotel another of her particular favourites and arguably one of the most famous places for afternoon tea in London.
Where Fortnum's is light, airy and a great place for people watching, Browns is dark, old fashioned and incredibly cosy, you can settle in for hours with their unlimited supply of tea, sandwiches, cakes and scones and it is almost as if time has stopped. It doesn't matter what is going on outside, Browns is it's own little world, and this makes it an incredibly relaxing place to have tea.
Its hard to dress the part when you are heavily pregnant. Luckily for me it was a boiling hot day so I could legitimately wear my massive stripey sundress, not quite the thing for Browns, which requests a smart casual dress code, but no one seemed to mind. Catherine had phoned ahead and demanded the comfiest seats for my massive bulk and my god they were comfortable. Beautiful accompaniment on the baby grand provided the soundtrack, and the service was impeccable.
 A wide variety of tea blends, including Browns own, are available (not quite as moreish as the Jubilee blend at Fortnums), finger sandwiches, scones, pastries and cakes appear almost instantly and are continuously replenished until you are full to bursting. The sandwiches (cucumber, smoked salmon, egg and cress, chicken salad and ham) were delicious, the scones are mini which I found incredibly appealing having stuffed myself on several rounds of sandwiches, served with clotted cream and strawberry jam. The cakes were particularly unusual and included a beautiful cranberry and elderflower jelly, a raspberry sponge and double chocolate cake.

It's hard to know which I preferred, Fortnums or Browns as they felt like completely different experiences. The service was better at Browns and it felt more private and personal, but Fortnums was so beautiful, light and airy and more buzzy, both fantastic for different reasons and great options for whatever your occassion. For real foodies, a private meeting or a dark, stormy winter's day go to Browns, for a treat after a days shopping, a bustly catch-up with girl friends off to Fornums with you.
Where Fortnum's is light, airy and a great place for people watching, Browns is dark, old fashioned and incredibly cosy, you can settle in for hours with their unlimited supply of tea, sandwiches, cakes and scones and it is almost as if time has stopped. It doesn't matter what is going on outside, Browns is it's own little world, and this makes it an incredibly relaxing place to have tea.
Its hard to dress the part when you are heavily pregnant. Luckily for me it was a boiling hot day so I could legitimately wear my massive stripey sundress, not quite the thing for Browns, which requests a smart casual dress code, but no one seemed to mind. Catherine had phoned ahead and demanded the comfiest seats for my massive bulk and my god they were comfortable. Beautiful accompaniment on the baby grand provided the soundtrack, and the service was impeccable.


It's hard to know which I preferred, Fortnums or Browns as they felt like completely different experiences. The service was better at Browns and it felt more private and personal, but Fortnums was so beautiful, light and airy and more buzzy, both fantastic for different reasons and great options for whatever your occassion. For real foodies, a private meeting or a dark, stormy winter's day go to Browns, for a treat after a days shopping, a bustly catch-up with girl friends off to Fornums with you.
14 July 2012
Jam Cookie Sandwiches
When a friend comes for tea I try to bake something new to try although as I'm getting bigger I'm also getting slightly lazier on that front. Which is a little weird as this baby wants me to eat sweet things all the time - which is a little mean of it as I'm now the size of a house. This tea time we're having Rachel Allen's Festive Jam Cookie Sandwiches from Bake and they were actually incredibly easy to make but gave me a new found respect for the incredible neatness of the ones pictured in the book. Mine don't look half so beautiful but they are incredibly yummy and I'm now always pleased to find new ways to eat jam - this is a great one!
She says to do these at Christmas as they look festive but I think they are just fine for any time of year. I left out the lemon zest because I hate lemon... I also halved the recipe because of my fear that I'm going to give myself pregnancy diabetes if I carry on like I am. Halving the recipe made about 10 cookies but I had to use a slightly bigger cutter than she does so I could make the holes... if that makes sense. You'll see what I mean.
Jam Cookie Sandwiches
Makes about 35
425g (15oz) plain flour
75g (3oz) caster sugar
2 tsp vanilla extract
2 tsp finely grated lemon zest (from 1 large lemon)
4 egg yolks
325g (11 ½oz) butter, softened
Raspberry or strawberry jam
Icing sugar for dusting
Pre-heat the oven to 180C/350F/Gas Mark 4. You will need 6cm (2 ½ inch) plain cutter and a 3cm (1 ¼ inch) cutter. I did half with sweet-tip raspberry jam and half with apricot. I used a magimix and it made the whole thing incredibly fast.
1. Sift the flour into a large bowl or electric food mixer and add the sugar, vanilla, lemon zest, egg yolks and butter. Mix until it all comes together in a dough.

2. Remove from the bowl and flatten with your palm or a rolling pin to about 2cm thick and chill in the fridge for at least 30 minutes (longer if possible).

3. Roll the dough out on a lightly floured work surface until it's about 5mm thick, then, using the 6cm plain cutter, cut the dough into discs.
4. Take half the discs and using the smaller 3cm cutter, cut holes out of the centre of each, like little round windows. Bring the discarded scraps together and make more discs and tops - you want to end up with an equal amount.
5. Place the discs on several prepared baking trays and bake in the oven for 8-10 minutes until pale golden and ever so slightly firm.

6. Allow to stand for a couple of minutes, then remove to a cooling rack.
7. When the discs are cool spread the whole discs with jam and top with a disc with a hole in it. Dust with icing sugar and serve.


21 June 2012
Basic Sponge Cake with Coffee Icing
I'm not really into cake. Most of the time I could live without it. Most of the time... about 10% of the time I want to mainline coffee cake. My mother showed me how to make this when I was quite young, partly because it's a nice thing to do and I think partly so I could bloody well start making it myself.
We cheat and use Camp coffee rather than making it fresh but I really like it this way... you can make up the coffee yourself if you would rather. I also do this in a slightly old fashioned way by weighing the eggs - I like doing it this way because I find the sponge is more moist. Will try and get a photograph of a slice before it's completely gone...
Coffee Cake
3 eggs,
butter
self-raising flour
caster sugar
For the butter icing:
200g icing sugar
85g butter
Camp coffee or strong instant coffee
The first thing I do is take the butter out of fridge. You want it to be soft so your arms don't fall off. You can make this in a mixer but I prefer to do it by hand. You will need two springform cake tins or loose bottomed ones. Approximately 7 1/2-8 inches - the bottoms lined with greaseproof paper and the sides greased with butter.
Preheat the oven to 120C/250C/Gas Mark 1/2.
1. Crack the eggs into a bowl and weigh them. You will then need the same amount of butter, sugar and self-raising flour.
2. Put the butter and sugar into a bowl and beat until light and fluffy.
3. Beat the eggs and then gradually add to the creamed mixture. If it curdles then add a handful of sifted flour.
4. Fold in the sieved flour with a metal spoon.
5. Diving the mixture between the two tins and bake in the oven for 25-35 minutes until risen and golden. Check they are cooked by putting a metal skewer into the middle - if it comes out clean they're done, if not, put them back in the oven for a few more minutes.
6. Cool on a rack in their tins until they are cool enough to be removed.

7. While the cakes are cooling make the icing by mixing together the icing sugar and butter until you have a paste. Then add the coffee a tiny bit at a time until you are happy with it. Put in the fridge until the cake is completely cool and ready to be iced.

8. Ice the cakes when they are cool. I use a metal spatula and do the top first so I can use as much as possible for the middle.
We cheat and use Camp coffee rather than making it fresh but I really like it this way... you can make up the coffee yourself if you would rather. I also do this in a slightly old fashioned way by weighing the eggs - I like doing it this way because I find the sponge is more moist. Will try and get a photograph of a slice before it's completely gone...
Coffee Cake
3 eggs,
butter
self-raising flour
caster sugar
For the butter icing:
200g icing sugar
85g butter
Camp coffee or strong instant coffee
The first thing I do is take the butter out of fridge. You want it to be soft so your arms don't fall off. You can make this in a mixer but I prefer to do it by hand. You will need two springform cake tins or loose bottomed ones. Approximately 7 1/2-8 inches - the bottoms lined with greaseproof paper and the sides greased with butter.
Preheat the oven to 120C/250C/Gas Mark 1/2.
 |
| Prepared cake tins |
1. Crack the eggs into a bowl and weigh them. You will then need the same amount of butter, sugar and self-raising flour.
2. Put the butter and sugar into a bowl and beat until light and fluffy.
 |
| Creaming the butter and sugar together |
3. Beat the eggs and then gradually add to the creamed mixture. If it curdles then add a handful of sifted flour.
4. Fold in the sieved flour with a metal spoon.
5. Diving the mixture between the two tins and bake in the oven for 25-35 minutes until risen and golden. Check they are cooked by putting a metal skewer into the middle - if it comes out clean they're done, if not, put them back in the oven for a few more minutes.
6. Cool on a rack in their tins until they are cool enough to be removed.

7. While the cakes are cooling make the icing by mixing together the icing sugar and butter until you have a paste. Then add the coffee a tiny bit at a time until you are happy with it. Put in the fridge until the cake is completely cool and ready to be iced.

8. Ice the cakes when they are cool. I use a metal spatula and do the top first so I can use as much as possible for the middle.
7 May 2012
Afternoon Tea - No. 1 Fortnum & Mason
I love Afternoon Tea... or High Tea as it used to be called and I just don't get enough of them. With a hungry husband to feed when he comes home I think he'd be pretty unimpressed if I said we were just having a light miso soup for supper as I'd had sandwiches, scones and cake at 4. My friend however not only loves afternoon tea but she has it quite often, and in all the best places (she won't go to the Ritz darling, or the Savoy 'not very good' she whispers). And she's a thin as a rake which just seems a little unfair! I haven't seen her for years so we wanted to meet somewhere, mid-afternoon for a non-coffee related catchup. She suggested Fortnums, I imagined a cup of builders and a slice of cake... how wrong I was.
 Fortnum and Mason is a British institution selling tea for over 300 years. And to celebrate the Diamond Jubilee they have revamped and reopened the St James's restaurant now to be called the Diamond Jubilee Tea Room and it is just gorgeous. Light and airy, modern but with an incredibly charming old fashioned air - there is a pianist in black tie to accompany your tea - I could have stayed there for hours. I was incredibly embarrassed to have turned up in jeans, trainers and my husbands shirt (I haven't made it out to maternity shopping yet). I had meant to change after a meeting that actually overran and although, as my mother points out, you don't really have to get dressed up for anything nowadays I really felt that Afternoon Tea at Fortnum's deserves a bit of effort in the dress department.
Now, I have to mention that I found the price a little hard to swallow at first, £38 per person, and the service was a little on the slow side (but they were busy). However, I can't remember a time I was as full and the tea was particularly delicious and the setting beautiful and after all this is tea at Fortnum's. It's a treat - it wouldn't be the same if you could afford it everyday and it just means you have to block a couple of hours out to blissfully settle in to sipping, chatting and grazing, in this fantastic atmosphere that really makes the price worth every penny.
The first thing I noticed, and if fact I couldn't take my eyes off it throughout was the turquoise china. Beautiful and stylish and actually very modern - important I think considering how easy it would be to make it too try-hard old-fashioned. Incredibly polite service and no one asking you if everything was alright every two minutes - you feel like you have all the time in the world and no one minds you being there as long as you like.
You get to choose your tea blend, we had Jubilee tea which was delicious, and then a stand is brought with finger sandwiches, scones and cakes. A separate stand holds the jams and clotted cream and tea comes with hot water to top it up with. The selection of sandwiches was delicious - smoked salmon, egg and cress, pastrami with horseradish, coronation chicken and cucumber - and are replenished once you have finished if you want more. The scones, a selection of plain and fruit, are really light and quite small so you don't feel weighed down and the jams delicious - although I was a bit sad that the apricot didn't seem to have made it to our table the raspberry was addictive!
Finally the cakes, which are small and manageable, where wonderful and more like little deserts - chocolate mousse, lemon tart, raspberries, eclairs. If you have managed to eat all of this you can go an select more cakes from the main cake stand - we didn't get this far (I had seconds of the sandwiches) but I could see and incredible battenburg and a lethal looking chocolate cake.
This was the most fun, and the biggest treat, I've had in ages. I am desperate for an excuse to go back although now I know that I am friends with surely London's top Afternoon Tea connoisseur we've decided to do a Tea Tour of which this is only the first stop. I'm hoping it wins so we can return to it triumphantly. We arrived at 3 and I had to leave at 5 and I just wasn't ready to go...
20 March 2012
Quick and Easy Chocolate Chip Cookies
I used to make these a lot at uni. Boys would turn up on my doorstep at 3am demanding that I make them and I haven't really made them since. But when my boss came to my flat for a meeting and wanted homemade cookies and my Hawaiian friend was on hand to eat most of the cookie dough so I didn't have to, I decided to dig out the old faithful recipe and give them a go.
The only problem was that the boss doesn't like dark chocolate really and there were no milk chocolate chips to be found so we bashed up some Minstrels and used those instead. I have to say I may just use them all the time in future - I don't really like cookies and I had two of these!
Chocolate Chip Cookies
Makes 20-30 cookies
300g plain flour
1/2 tsp bicarbonate of soda
1 tsp salt
170g butter, slightly softened
215g light brown sugar
1 tbsp Vanilla extract
1 large egg
1 large egg yolk
300g chocolate chips (or just under 2 large bags of minstrels)
Pre-heat the oven to 190C/375F/Gas Mark 5. You will need a couple of lined baking sheets - I prefer the reusable Teflon ones - two mixing bowls and a cooling rack.
1. Sift together the flour, bicarbonate of soda and salt and set aside.
2. Stir together the soft butter, sugar and Vanilla extract then add the egg and the yolk. Beat well to ensure the egg is evenly distributed.

3. If you are using Minstrels then wrap them in a clean teatowel and bash with a rolling pin - you don't want it to be too fine though. You could also pulse carefully in a Magimix.
4. Stir in the dry ingredients and then fold in the chocolate chips. It may be easier to do this by hand...
5. Form the dough into a rough sausage shape, cover in clingfilm and chill until firm - at least 30 minutes.
6. When the dough is ready, make hockey puck shapes and press onto the prepared baking tray.
7. Bake for approximately 10 minutes in the pre-heated oven until the edges begin to look golden.
8. Cool on the sheet for a minute then remove to a cooling rack.
The only problem was that the boss doesn't like dark chocolate really and there were no milk chocolate chips to be found so we bashed up some Minstrels and used those instead. I have to say I may just use them all the time in future - I don't really like cookies and I had two of these!
Chocolate Chip Cookies
Makes 20-30 cookies
300g plain flour
1/2 tsp bicarbonate of soda
1 tsp salt
170g butter, slightly softened
215g light brown sugar
1 tbsp Vanilla extract
1 large egg
1 large egg yolk
300g chocolate chips (or just under 2 large bags of minstrels)
Pre-heat the oven to 190C/375F/Gas Mark 5. You will need a couple of lined baking sheets - I prefer the reusable Teflon ones - two mixing bowls and a cooling rack.
1. Sift together the flour, bicarbonate of soda and salt and set aside.
2. Stir together the soft butter, sugar and Vanilla extract then add the egg and the yolk. Beat well to ensure the egg is evenly distributed.

3. If you are using Minstrels then wrap them in a clean teatowel and bash with a rolling pin - you don't want it to be too fine though. You could also pulse carefully in a Magimix.
 |
| Jo bashing up the Minstrels |
4. Stir in the dry ingredients and then fold in the chocolate chips. It may be easier to do this by hand...
 |
| Mixing in the chocolate chips by hand |
6. When the dough is ready, make hockey puck shapes and press onto the prepared baking tray.
7. Bake for approximately 10 minutes in the pre-heated oven until the edges begin to look golden.
8. Cool on the sheet for a minute then remove to a cooling rack.
 |
| Finished Cookies |
5 August 2011
Cockeyed Cake
This is an incredibly old recipe but it is by far and away the easiest chocolate cake to make. It takes 10 mins max to make and 30 mins or less in the oven. This is a particular favourite of mine for any last minute cake necessities and things that require all attendees to bring something along (I hate that normally...). The recipe I use is based on Peg Bracken's from The I Hate to Cook Book and is all measured in cups. I have done the conversion but left the cups in as that's what I use for this and it just adds to the ease.
The reason I'm making this cake tonight is that today is Mouse's (the dog's) birthday so tomorrow as some light relief in the office we are having traditional office tea and cake. I am making Mouse a peanut butter and carrot cake which is dog friendly but thought I can't really not make one for the human attendees and this is the obvious one to choose. This cake can be iced or not - this time I made butter icing because I didn't have enough plain chocolate and cream for ganache which is what I usually do. The one thing is to not ice this too early. The icing will slide off and you will be sad.
No don't freak out when you see the ingredients, it's unconventional but it works and it makes the best tasting batter ever.
COCKEYD CAKE
1 1/2 cups (340g/12 oz) plain flour
3 tbsp cocoa
1 tsp bicarbonate of soda
1 cup (226g/8 oz) sugar
1/2 tsp salt
5 tbsp cooking oil (I use sunflower oil)
1 tbsp vinegar
1 tsp vanilla extract
1 cup (240 ml) cold water
Pre-heat the oven to 180C/350F. I make this in an 8x4 inch loaf tin.
1. Sift the flour, cocoa, bicarbonate of soda, sugar and salt together into a large mixing bowl.
2. Tip in the cooking oil, vinegar, vanilla and cold water and mix together until it's nearly smooth and all the flour is mixed in. This feels like pretend cooking but it will work.

3. Tip into the greased tin and cook for 30ish minutes. I check mine after 25 but this time took the full 30.
4. Leave to cool in it's tin on a cooling rack for half an hour or so and then turn it out and leave to cool completely. Ice... or not.

and is all measured in cups. I have done the conversion but left the cups in as that's what I use for this and it just adds to the ease.The reason I'm making this cake tonight is that today is Mouse's (the dog's) birthday so tomorrow as some light relief in the office we are having traditional office tea and cake. I am making Mouse a peanut butter and carrot cake which is dog friendly but thought I can't really not make one for the human attendees and this is the obvious one to choose. This cake can be iced or not - this time I made butter icing because I didn't have enough plain chocolate and cream for ganache which is what I usually do. The one thing is to not ice this too early. The icing will slide off and you will be sad.
No don't freak out when you see the ingredients, it's unconventional but it works and it makes the best tasting batter ever.
COCKEYD CAKE
1 1/2 cups (340g/12 oz) plain flour
3 tbsp cocoa
1 tsp bicarbonate of soda
1 cup (226g/8 oz) sugar
1/2 tsp salt
5 tbsp cooking oil (I use sunflower oil)
1 tbsp vinegar
1 tsp vanilla extract
1 cup (240 ml) cold water
Pre-heat the oven to 180C/350F. I make this in an 8x4 inch loaf tin.
1. Sift the flour, cocoa, bicarbonate of soda, sugar and salt together into a large mixing bowl.
2. Tip in the cooking oil, vinegar, vanilla and cold water and mix together until it's nearly smooth and all the flour is mixed in. This feels like pretend cooking but it will work.

3. Tip into the greased tin and cook for 30ish minutes. I check mine after 25 but this time took the full 30.
4. Leave to cool in it's tin on a cooling rack for half an hour or so and then turn it out and leave to cool completely. Ice... or not.

1 August 2011
Rachel Allen's Ginger and Honey Snaps
Yet another tasty and easy recipe from Bake although I did make some amendments throughout - as always. When I was off on the sponsored ride I needed to take something to each of the three places I was staying as a thank you present and I thought home made biscuits would be quite nice. I'm a real sucker for ginger biscuits even though on the whole I'm not a huge biscuit fan so I've been desperate for an excuse to make these since I got the book.
I think if you followed the recipe exactly you get sort of cookie size biscuits which was fine but I wanted something a little smaller so rather than the 20 biscuits I got about 40. If you'd rather have smaller biscuits then roll the dough smaller than a walnut - they need to be really small as they grow quite a lot in the oven.
Ginger and Honey Snaps
Makes about 20 cookie size or 40 smaller
225g self-raising flour
2 tsp bicarbonate of soda
a pinch of salt
1 tsp ground ginger
1 tsp mixed spice
1/2 tsp ground cinnamon
100g caster sugar
125g butter, cold and cubed
100g (approx 7 tbsp) runny honey
Pre-heat the oven to 180C/350F/Gas Mark 4. The recipe says 1 large baking sheet but I use two and alternate them. These are quick cooking biscuits so you can be making up a tray while one cooks... and I don't have a large baking sheet anyway (snivel). I use a re-usable baking sheet but you can grease the tins with vegetable oil if you prefer. It's also useful to have a measuring jug with water in it and fork resting in it - you need a damp fork to shape the biscuits and it's good to get this ready before your hands get all doughy.
1. Sift the flour, bicarbonate of soda, salt and spices into a large mixing bowl - add the sugar and mix well.
2. Rub the butter into the flour and spices, using your fingers, until the mixture resembles breadcrumbs.

3. Heat the honey gently in a small saucepan, then pour into the flour using a wooden spoon to mix it altogether.

4. Sprinkle 1 tbsp of caster sugar on a side plate and then, using floured hands, roll the dough into small balls, roll in the caster sugar and then place on the prepared baking sheet. They need quite a bit of room on the sheet as they will expand.

5. Using a damp fork flatten the balls to make biscuit shapes and bake in the oven for 7-10 minutes. My oven blows hot so these actually took just under 7 minutes. You really want these to be just golden brown. If they are too dark they will taste bitter.
6. Leave on the baking tray for two minutes before carefully transferring to a wire cooling wrack.
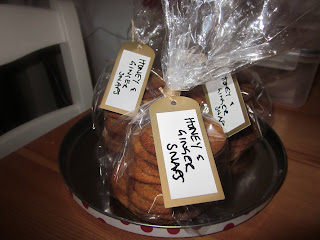
You can make the dough a couple of days ahead, roll into a sausage, cover with cling film and keep in the fridge. When you want to make the cookies chop a slice off the sausage and roll as above.
I think if you followed the recipe exactly you get sort of cookie size biscuits which was fine but I wanted something a little smaller so rather than the 20 biscuits I got about 40. If you'd rather have smaller biscuits then roll the dough smaller than a walnut - they need to be really small as they grow quite a lot in the oven.
Ginger and Honey Snaps
Makes about 20 cookie size or 40 smaller
225g self-raising flour
2 tsp bicarbonate of soda
a pinch of salt
1 tsp ground ginger
1 tsp mixed spice
1/2 tsp ground cinnamon
100g caster sugar
125g butter, cold and cubed
100g (approx 7 tbsp) runny honey
Pre-heat the oven to 180C/350F/Gas Mark 4. The recipe says 1 large baking sheet but I use two and alternate them. These are quick cooking biscuits so you can be making up a tray while one cooks... and I don't have a large baking sheet anyway (snivel). I use a re-usable baking sheet but you can grease the tins with vegetable oil if you prefer. It's also useful to have a measuring jug with water in it and fork resting in it - you need a damp fork to shape the biscuits and it's good to get this ready before your hands get all doughy.
1. Sift the flour, bicarbonate of soda, salt and spices into a large mixing bowl - add the sugar and mix well.
2. Rub the butter into the flour and spices, using your fingers, until the mixture resembles breadcrumbs.

3. Heat the honey gently in a small saucepan, then pour into the flour using a wooden spoon to mix it altogether.

4. Sprinkle 1 tbsp of caster sugar on a side plate and then, using floured hands, roll the dough into small balls, roll in the caster sugar and then place on the prepared baking sheet. They need quite a bit of room on the sheet as they will expand.

5. Using a damp fork flatten the balls to make biscuit shapes and bake in the oven for 7-10 minutes. My oven blows hot so these actually took just under 7 minutes. You really want these to be just golden brown. If they are too dark they will taste bitter.
6. Leave on the baking tray for two minutes before carefully transferring to a wire cooling wrack.

You can make the dough a couple of days ahead, roll into a sausage, cover with cling film and keep in the fridge. When you want to make the cookies chop a slice off the sausage and roll as above.
10 July 2011
Fruit-free Fridge Cake
I'm not much of a cake fan, I don't really have a sweet tooth but I have always found fridge cake pretty irresistible. I have, however, never made it... until now. Lovely friends had brand spanking new baby and I didn't even have time to make my New Baby Brownies but I did want to take something homemade round that would be useful to give to all the visitors you inevitably have when you bring your baby home. This gave me the perfect excuse to make fridge cake and although I took a big box round to them I did keep 8 or so little slices for us as a treat. This is incredibly easy and versatile - you can use whatever you have in the cupboard and of course you can use fruit and nuts if you like but I think it's so incredibly decadent you should just go for it on the naughty front and keep the fruit for another time.
FRUIT-FREE FRIDGE CAKE
Makes 12 - 16 squares - depending on how you cut them
150g dark chocolate
150g milk chocolate
100g butter
150g golden syrup
250g digestive biscuits, crushed
2 Mars bars, chopped into cubes
2 regular sized bags Malteasers
A handful of mini marshmallows
You need a small-ish baking tin - I used my 8 x 8 inch one that I use for Turkish Delight - line it with clingfilm so that you have lots of overhang on each side.
1. Melt the chocolate, butter and golden syrup in a heatproof bowl over a pan of boiling water stirring occasionally.
2. When it has all melted together remove from the heat and stir in the biscuits, Mars bar, Malteasters and marshmallows.
3. Tip the whole lot into your cake tin and make sure it's in every corner and relatively smooth on top - a potato masher is good for this.
4. Cover the top with the overhanging clingfilm and put in the fridge until you need it or for at least 2 hours.
5. When you are ready to chop it up then you can use the clingfilm to maneuver it out of the tin. Then cut up with a sharp knife into the size squares you like. This is best kept in the fridge when you are not wanting it and lasts for ages.
 |
| Chopping up the fridge cake! |
5 June 2011
Dark Chocolate Ginger Squares

Dark Chocolate Ginger Squares
Makes about 20 squares
225g (8 oz) butter, cut into cubes
225g (8 oz) dark chocolate broken into bits
2 large egg yolks
225g (8 oz) ginger biscuits, crumbed
3 tablespoons ginger wine
8 pieces stem ginger, drained and sliced finely
Claire uses 120g (4 oz) toasted pistachio's which I leave out. I use Stone's ginger wine but any will do. Butter a brownie tin and line the bottom with baking paper.
1. Put the biscuits in a sturdy plastic freezer bag and bash with a rolling pin. You can use a magimix if you want but it'll be less therapeutic. Tip into a big mixing bowl.
 |
| Crumbed Biscuits |
2. Thoroughly mix the ginger wine in with the biscuit crumbs.
3. Melt the chocolate and butter together over a gentle heat in a heavy based saucepan. Stir together until it is thick and glossy.
4. Beat the egg yolks into the hot chocolate and butter mixture.
5. Mix the ginger biscuit crumbs, and the pistachio's if you are using them, and half the stem ginger into the chocolate mixture. Stir thoroughly.
6. Pour the mixture into the prepared tin so it's smooth and even. Leave to set.
7. When it's mostly set scatter the remaining stem ginger over the top and cut into squares.
 |
| Finished Dark Chocolate Ginger Squares |
10 April 2011
Rachel Allen's Peanut Butter and White Chocolate Blondies
For mothers day my sister and I hosted a lunch for my parents at my flat - we ordered in sushi (from Feng Sushi) and went for a walk in Ravenscourt Park. It was actually pretty nice weather and having assumed it would not be I had persuaded my mother to bring wellies so we strode about the park in the sun feeling like we had got lost on a countryside ramble. We had also decided to do cream tea for when we returned and my penchant for over feeding reared it's ugly head and so I made Rachel Allen's Peanut Butter and White Chocolate Blondies. Now I don't like white chocolate so I didn't try one but I think these went even quicker than brownies... a few were eaten at tea and then Joe took them to work the next day. I don't think they made it to lunch time - always a good sign I think. Highly recommended if you want too cook something easy, yummy and not brownies! This recipe is taken from Bake - a book I'm more and more in love with every time I use it.
Rachel Allen's Peanut Butter and White Chocolate Blondies
Makes 12 squares
125g plain flour
1 tsp baking powder
100g butter, softened
150g crunchy peanut butter
175g soft light brown sugar
1 egg, beaten
1 tsp vanilla extract
75g white chocolate, chopped
Pre-heat the oven to 170C/325F/Gas Mark 3 and line and grease a 20x20cm square cake tin. I softened my butter for 10 seconds in the microwave but if you're clever you can just take it out of the fridge a bit before you want to cook. I used a milky bar for the white chocolate - it was impossible to find an alternative within a 1 mile radius of my flat!
1. Sift the flour and baking powder into a small bowl and set aside.
2. In a large bowl, cream the butter and peanut butter together until very soft. Add the sugar, egg and vanilla extract and beat until combined. Add the flour, baking powder and the chopped chocolate and mix to form a dough.
 3. Place the dough in the prepared tin and bake in the oven for 25-30 mins or until golden brown and almost firm in the centre.

4. Allow to cool in the tin, before removing and cutting into squares*.
*As with brownies I actually find it easier and less messy to cut these in the tin and then using a small spatula to ease them out.
 For mothers day my sister and I hosted a lunch for my parents at my flat - we ordered in sushi (from Feng Sushi) and went for a walk in Ravenscourt Park. It was actually pretty nice weather and having assumed it would not be I had persuaded my mother to bring wellies so we strode about the park in the sun feeling like we had got lost on a countryside ramble. We had also decided to do cream tea for when we returned and my penchant for over feeding reared it's ugly head and so I made Rachel Allen's Peanut Butter and White Chocolate Blondies. Now I don't like white chocolate so I didn't try one but I think these went even quicker than brownies... a few were eaten at tea and then Joe took them to work the next day. I don't think they made it to lunch time - always a good sign I think. Highly recommended if you want too cook something easy, yummy and not brownies! This recipe is taken from - a book I'm more and more in love with every time I use it.
Rachel Allen's Peanut Butter and White Chocolate Blondies
Makes 12 squares
125g plain flour
1 tsp baking powder
100g butter, softened
150g crunchy peanut butter
175g soft light brown sugar
1 egg, beaten
1 tsp vanilla extract
75g white chocolate, chopped
Pre-heat the oven to 170C/325F/Gas Mark 3 and line and grease a 20x20cm square cake tin. I softened my butter for 10 seconds in the microwave but if you're clever you can just take it out of the fridge a bit before you want to cook. I used a milky bar for the white chocolate - it was impossible to find an alternative within a 1 mile radius of my flat!
1. Sift the flour and baking powder into a small bowl and set aside.
2. In a large bowl, cream the butter and peanut butter together until very soft. Add the sugar, egg and vanilla extract and beat until combined. Add the flour, baking powder and the chopped chocolate and mix to form a dough.


4. Allow to cool in the tin, before removing and cutting into squares*.
*As with brownies I actually find it easier and less messy to cut these in the tin and then using a small spatula to ease them out.
 |
| Finished Blondies in their tin |
28 March 2011
Cheese Cows
Now I am in no way an animal fascist. You can make these in any animal shape you want or indeed any shape you like. This is not really a 'traditional' cheese straw recipe - which I do in either straw or star shape. For this recipe I like animals though - I have pig, cow and elephant... I want more. I want a whole zoo. Anyway, that's not the point. This is a really easy recipe that's yummy and rather addictively tasty.
UPDATE 2017: these are my most requested treat. For every kids party, christmas party, in face any event I get asked to make these.
CHEESE COWS
Makes approx 25 cows
Pre-heat the oven to 180C/355F/Gas Mark 4.
170g (60z) mature cheddar, coarsely grated
60g butter
95g plain flour
1/8 tsp onion powder
1/8 tsp table salt
Pre-heat the oven to 170C/350F/Gas Mark 4. You'll need a food processor (unless you want sore arms), a large baking sheet (or a couple of small ones if you are like me and can never find a suitable big one), and a cooling rack. I only mention it because I only remember I need one when I'm holding the hot baking tray in my hands. You can add more or less of the onion powder as you wish but increase/decrease the salt accordingly as the onion powder is salty itself.
1. Put all the ingredients together in the mixer and blend until it forms a dough. About two minutes.
2. Wrap the dough ball in cling film and refrigerate for half an hour. This makes it much more manageable when you are rolling it and cutting out your shapes later.
3. Lightly flour a surface or board and your rolling pin and roll the dough out until it's reasonably thin (about 3mm). Cut your shapes out with the cutter of choice. It's easiest if you flour the cutter in-between using a small plate of flour but I am usually too lazy to do this.
4. Put the shapes onto a lined baking tray. These go up rather than out so they can be quite close together. I got a bit carried away and used a skewer to make eyes but you really don't have to do that.
5. Bake in the oven for 12-15 mins. Check after 10 though - my oven is quite hot. They need to be browned at the edges although of course it is up to you how cooked they are.
6. Put on a rack to cool. And then into a tin to keep them fresh.

7.Try not to eat them all yourself. Although obviously you can if you want.
UPDATE 2017: these are my most requested treat. For every kids party, christmas party, in face any event I get asked to make these.
CHEESE COWS
Makes approx 25 cows
Pre-heat the oven to 180C/355F/Gas Mark 4.
170g (60z) mature cheddar, coarsely grated
60g butter
95g plain flour
1/8 tsp onion powder
Pre-heat the oven to 170C/350F/Gas Mark 4. You'll need a food processor (unless you want sore arms), a large baking sheet (or a couple of small ones if you are like me and can never find a suitable big one), and a cooling rack. I only mention it because I only remember I need one when I'm holding the hot baking tray in my hands. You can add more or less of the onion powder as you wish but increase/decrease the salt accordingly as the onion powder is salty itself.
1. Put all the ingredients together in the mixer and blend until it forms a dough. About two minutes.
2. Wrap the dough ball in cling film and refrigerate for half an hour. This makes it much more manageable when you are rolling it and cutting out your shapes later.
 |
| Dough ready to be rolled |
3. Lightly flour a surface or board and your rolling pin and roll the dough out until it's reasonably thin (about 3mm). Cut your shapes out with the cutter of choice. It's easiest if you flour the cutter in-between using a small plate of flour but I am usually too lazy to do this.
4. Put the shapes onto a lined baking tray. These go up rather than out so they can be quite close together. I got a bit carried away and used a skewer to make eyes but you really don't have to do that.
 |
| Cows ready for the oven |
 |
| Cooling Cows |
6. Put on a rack to cool. And then into a tin to keep them fresh.

7.Try not to eat them all yourself. Although obviously you can if you want.
12 January 2011
Jo's Birthday Lemon Drizzle
It was Jo's birthday last weekend, I work with her, she designs lovely book covers and did the bunting for this blog, and we're having tea and cake in her honour tomorrow and her favourite cake is lemon drizzle. I made her one ages ago when she first told me this and it was really hard to find a recipe so I sort of made one up using lots of different variations. I'm sure it's pretty basic but it seemed to go down well. I'm quite pleased it's her favourite because I hate lemon so I won't be tempted to eat it all myself. I'm not really a massive cake eater but since I've given up smoking I can't seem to help myself.
Anyway here it is... it may be horrid. I'm never going to taste it and people may just be being polite!
JO'S BIRTHDAY LEMON DRIZZLE
For the batter:
225g softened salted butter
225g caster sugar
4 eggs
zest of 1 lemon, finely grated
225g self raising flour
For the drizzle:
juice from 2 lemons
120g caster sugar
I use a loaf tin I'm not sure of the exact size technically but it's 9 inches long. I cheat and line it with shop bought liners (I love them... refer back to my I Heart Lakeland post) but otherwise just line with ordinary greaseproof paper. Pre-heat the oven to 180C/356F/Gas Mark 4.
1. Beat the butter and sugar together until its pale and creamy. I use butter that's been out of the fridge then give it a quick 10 seconds in the microwave otherwise my arm feels like it's going to fall off.
2. Add the eggs one at a time and stir in slowly.
3. Sift in the flour and grate in the lemon zest and then stir the whole thing until combined and smooth.
4. Spoon into the cake tin, plonk into the oven and cook for 40-45 mins (mine took 45 mins and my oven is usually on the hot side). Check it's cooked by sticking a skewer in (no you don't need a specialist cake tester). If it comes out clean it's done, if it doesn't, cook it for a couple more minutes and test again.
5. When it's cooked leave it to cool in it's tin on a wire rack.
6. While the cake is cooling whisk together the sugar and lemon juice. Piece the top of the cake with a fork and then pour over the lemon drizzle.
7. Leave the cake to cool completely in it's tin and then tip it out when you want it. Do this somewhere where you don't mind everything being covered in excess sticky lemon drizzle though. Mouse has been licking the floor by our kitchen table ever since and I couldn't work out why.
P.S actually got told this was a 10 out of 10 so was pretty pleased with that!
Anyway here it is... it may be horrid. I'm never going to taste it and people may just be being polite!
JO'S BIRTHDAY LEMON DRIZZLE
For the batter:
225g softened salted butter
225g caster sugar
4 eggs
zest of 1 lemon, finely grated
225g self raising flour
For the drizzle:
juice from 2 lemons
120g caster sugar
I use a loaf tin I'm not sure of the exact size technically but it's 9 inches long. I cheat and line it with shop bought liners (I love them... refer back to my I Heart Lakeland post) but otherwise just line with ordinary greaseproof paper. Pre-heat the oven to 180C/356F/Gas Mark 4.
1. Beat the butter and sugar together until its pale and creamy. I use butter that's been out of the fridge then give it a quick 10 seconds in the microwave otherwise my arm feels like it's going to fall off.
2. Add the eggs one at a time and stir in slowly.
3. Sift in the flour and grate in the lemon zest and then stir the whole thing until combined and smooth.
4. Spoon into the cake tin, plonk into the oven and cook for 40-45 mins (mine took 45 mins and my oven is usually on the hot side). Check it's cooked by sticking a skewer in (no you don't need a specialist cake tester). If it comes out clean it's done, if it doesn't, cook it for a couple more minutes and test again.
5. When it's cooked leave it to cool in it's tin on a wire rack.
6. While the cake is cooling whisk together the sugar and lemon juice. Piece the top of the cake with a fork and then pour over the lemon drizzle.
7. Leave the cake to cool completely in it's tin and then tip it out when you want it. Do this somewhere where you don't mind everything being covered in excess sticky lemon drizzle though. Mouse has been licking the floor by our kitchen table ever since and I couldn't work out why.
 |
| Got so carried away that I only remembered to take a photo at the end... ta-da! |
3 December 2010
New Baby Brownies

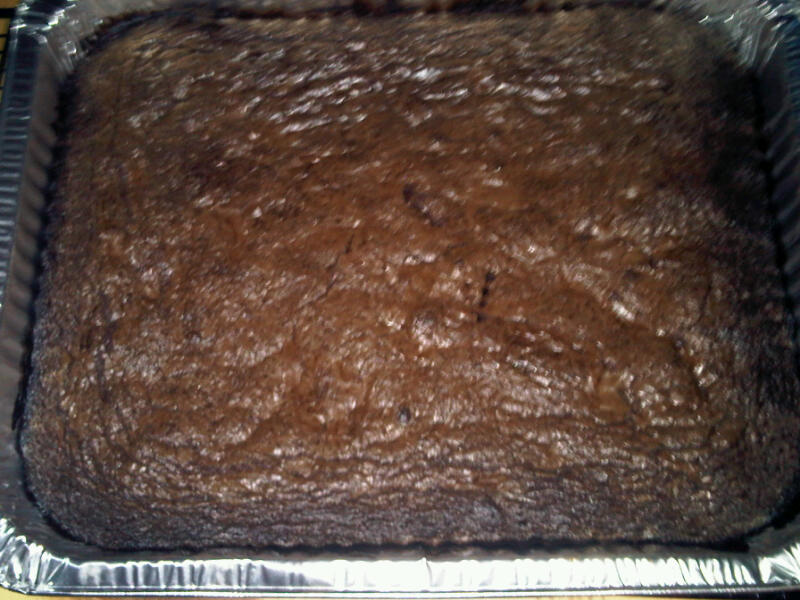
I find it really hard to know what to get friends who have just had babies as they get loads of presents and some people are off some things and some people will only use one type of thing so I always try and bake something instead. New parents are likely to have lots of visitors so I think it probably helps to have baked goods to offer them, I also thing a quick sugar fix that can be eaten one handed is a must for nursing mothers! So in honour of little Lilly who was born on Tuesday here are my New Baby Brownies.
Preheat the oven to 180C/356F/Gas Mark 4
300g caster sugar (I like to use golden caster sugar here but you don't have to)
250g butter
250g chocolate, broken into pieces and 50g put aside
3 large eggs and 1 extra egg yolk, beaten with a fork
60g plain flour
60g good quality cocoa powder
1/2 tsp baking powder
pinch of salt
I make them in a disposable foil roasting tin because they never have to go anywhere else and when they're finished it can just be thrown away but any Swiss roll tin will do - the small it is the fatter they'll be and vice versa. If you are using a non-disposable Swiss roll tin then you'll need to line the bottom with baking paper.
1. Cream the butter and sugar together - ideally use a Kitchenaid as the mixer on this is ideal, I use my trusty Magimix but if you don't have either then do by hand. This needs to be really creamy though so be prepared for a bit of arm ache if you are doing it manually.
1. Cream the butter and sugar together - ideally use a Kitchenaid as the mixer on this is ideal, I use my trusty Magimix but if you don't have either then do by hand. This needs to be really creamy though so be prepared for a bit of arm ache if you are doing it manually.
2. Melt the 200g of chocolate pieces in a bowl over a simmering pan of water (make sure the bottom of the bowl is not touching the water). Once the chocolate is melted then take it off the heat and stand to one side.

 |
| Sifted dry ingredients |
4. Slowly add the beaten eggs to the butter and sugar mixing in between additions. If you are using a kitchen aid then remove the bowl once all the eggs are added. I have a Magimix so I tip the mixture into a new mixing bowl.
5. Break up the remaining 50g of chocolate into small pieces. I do this by putting them in a freezer bag and bashing them with a rolling pin. Very satisfying but slightly annoying for our upstairs neighbours. Add the melted chocolate and chocolate pieces to the butter/sugar/egg mix, folding them in with a metal spoon.
 |
Post-chocolate, pre-flour
|
6. Finally fold in the dry ingredients - try to be gentle as you don't want to knock all the air out.
7. Pour the mixture into your tin, smooth the top and put in the oven for about 25-30mins. Brownies continue to cook as they cool so you want them to be cooked enough so that a skewer comes out sticky but not covered in raw ingredients when poked in the centre.

8. Leave to cool on a rack in their tin for at least an hour before removing them or cutting them into their squares. If you are being fancy schmancy you can dust with icing sugar. But I never do.
18 November 2010
Jam Tarts
I love cooking but I think if I could only choose one meal to cook for it would be tea (does that count as a meal? I think so). I really don't have a sweet tooth and I think my favourite meal of the day is breakfast (when I can eat or drink anything bizarrely) but there is something decadent about tea that I just can't help getting excited about. So when my parents decided to come and visit us to pick up some logs (long story involving chainsaws and my garden being massacred) and have tea I thought I'd use it as an excuse to get a bit Enid Blighton and cover my table in goodies. I was going to make crumpets but I ran out of time but I did manage to make jam tarts and ginger biscuits.
The jam tarts were something I've wanted to do for ages because I love the ones you get in a packet but there are never enough apricot and those are me and my dad's favourite. As he's not been well and needs feeding up I went on a bit of an apricot bonanza and then managed to eat at least half of them myself. In that first batch I followed a recipe that used icing sugar but I think caster sugar gives your pastry better consistency. I also found that a lot of recipes tell you to use unsalted butter and then add a pinch of salt but I'm lazy and a devotee of salted butter (I won't have unsalted in the house) so I just ignore that bit. So here's my current favourite jam tart recipe which I think is just perfect for rainy Sunday afternoons and also seem to be a bit of a hit in the office.
JAM TARTS
makes about 16-20
180g plain flour
60g caster sugar
120g butter
2 egg yolks, or 1 eggs yolk and 2 tbsps water
Any kind of jam you want - my favourites are apricot and sweet tip raspberry.
You will need 2 bun trays, a rolling pin and a circular pastry cutter. Pre-heat the oven to 190C/gas mark 5/375F.
1. Sift the flour and sugar together and then rub in the butter. The pastry is better if the butter is cold so chop it up into small squares before adding it to the sugar and flour - this makes it easier to rub in.
2. Add some of the egg liquid and bring the dough together - I do this all with my hands, it's messy but it saves on washing up and you're going to have to use your hands in the end anyway. Use as little of the liquid as possible but remember that you don't want the pastry to be do dry - I find that if I'm using 2 egg yolks (which I prefer) then I use all of it, when I'm using egg yolk and water I don't quite need it all.
3. Make the dough into a flat hamburger shape (making it easier to roll when it's cold), put into a sandwich bag or clingfilm and put in the fridge for at least an hour. All recipes I've read differ on this but I find that after an hour its much nicer to roll and re-roll because the butter is properly chilled. If you are a complete domestic goddess you could whip this up in the morning and have it ready to go whenever you want to make the jam tarts for tea!


 I love cooking but I think if I could only choose one meal to cook for it would be tea (does that count as a meal? I think so). I really don't have a sweet tooth and I think my favourite meal of the day is breakfast (when I can eat or drink anything bizarrely) but there is something decadent about tea that I just can't help getting excited about. So when my parents decided to come and visit us to pick up some logs (long story involving chainsaws and my garden being massacred) and have tea I thought I'd use it as an excuse to get a bit Enid Blighton and cover my table in goodies. I was going to make crumpets but I ran out of time but I did manage to make jam tarts and ginger biscuits.
The jam tarts were something I've wanted to do for ages because I love the ones you get in a packet but there are never enough apricot and those are me and my dad's favourite. As he's not been well and needs feeding up I went on a bit of an apricot bonanza and then managed to eat at least half of them myself. In that first batch I followed a recipe that used icing sugar but I think caster sugar gives your pastry better consistency. I also found that a lot of recipes tell you to use unsalted butter and then add a pinch of salt but I'm lazy and a devotee of salted butter (I won't have unsalted in the house) so I just ignore that bit. So here's my current favourite jam tart recipe which I think is just perfect for rainy Sunday afternoons and also seem to be a bit of a hit in the office.
JAM TARTS
makes about 16-20
180g plain flour
60g caster sugar
120g butter
2 egg yolks, or 1 eggs yolk and 2 tbsps water
Any kind of jam you want - my favourites are apricot and sweet tip raspberry.
You will need 2 bun trays, a rolling pin and a circular pastry cutter. Pre-heat the oven to 190C/gas mark 5/375F.
1. Sift the flour and sugar together and then rub in the butter. The pastry is better if the butter is cold so chop it up into small squares before adding it to the sugar and flour - this makes it easier to rub in.
2. Add some of the egg liquid and bring the dough together - I do this all with my hands, it's messy but it saves on washing up and you're going to have to use your hands in the end anyway. Use as little of the liquid as possible but remember that you don't want the pastry to be do dry - I find that if I'm using 2 egg yolks (which I prefer) then I use all of it, when I'm using egg yolk and water I don't quite need it all.
3. Make the dough into a flat hamburger shape (making it easier to roll when it's cold), put into a sandwich bag or clingfilm and put in the fridge for at least an hour. All recipes I've read differ on this but I find that after an hour its much nicer to roll and re-roll because the butter is properly chilled. If you are a complete domestic goddess you could whip this up in the morning and have it ready to go whenever you want to make the jam tarts for tea!

4. When you are ready take the pastry out of the fridge and roll it out on a floured surface, cut out circles with your pastry cutter and put them in the bun tins.

5. Put the tins in the fridge for 20-30 minutes and then add the jam. Now you only need a heaped teaspoon or so of jam - it's very tempting to overfill them but they'll just bubble over if you do and that means hellish washing up.

6. Put the tarts in the oven for about 10 minutes but keep an eye on them. I think my oven runs a bit hot so it could be that yours take longer - you want the tarts to be looking golden around the edges and the jam to be bubbling.
7. Take the tarts out of the oven and leave to cool on a rack in their tins. After about 10-15 mins you can get them out of the tin and straight onto the rack. I have a trusty metal spatula I use for this but a round tipped knife would do just as well - they should come out quite easily so you can be gentle. Then they are all ready to be eaten - if you want to be fancy you can dust them with icing sugar but I'm not. I think they are quite sweet enough but as I said earlier, I don't really have a sweet tooth.

Subscribe to:
Posts (Atom)
©
Blue Sky and Bunting. All rights reserved.