12 January 2022

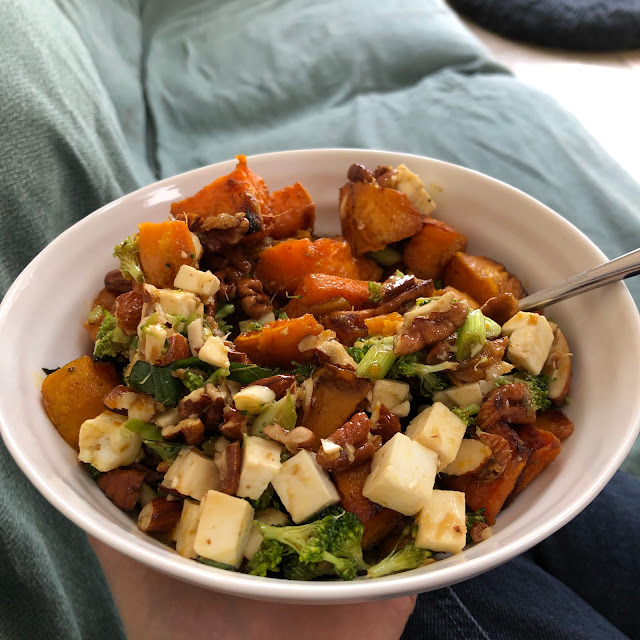
Sweet Potato Salad

I'm late to the sweet potato party but I'm making up for lost time. I'm not a huge fan of potatoes in general and the name sweet potato does not do this delicious, filling healthy object justice. With both of us working from home and me doing the majority of homeschooling I handed the cooking reigns over to Joe but since moving to Hampshire just before Christmas I have taken back one reign and will occasionally do a freezer filler or a filling salad for a healthy lunch and this is one of my go to's. 

You can of course tweak it to suit your tastes - I would always add pomegranate seeds, Joe can live without them - but this should be just what you need to liven up your working-from-home lunch break and you can cook the sweet potato, keep in the fridge and then make the salad when you need to which means it takes a matter of minutes. 


Sweet Potato and feta salad


This is the basic recipe - I tend to do the sweet potato, I usually have feta in the fridge and some herbs and then add whatever else I have. Avocado is delicious in this as are a few spinach leaves. 

Sweet Potato & Feta Salad
serves 2

2 sweet potatoes 
1/2 block feta, cut into cubes
Pumpkin seeds and/or pine nuts
Pecans and/or almonds, chopped
Half a head of broccoli
1 tbsp teriyaki 
1/2 tsp turmeric
1/2 tsp cumin
basil or any fresh herb you like
salt & pepper

For the dressing:
soy
honey
olive oil
fresh ginger

Pre-heat oven to 200C/

1. Peel the sweet potato and cut into cubes, you can par boil it or not. If you do it will reduce the time in the oven. Then toss in oil, cumin and turmeric and cook in the oven for about 40-45 minutes or until slightly crispy. 

2. In a small frying pan over a low heat sprinkle the pumpkin seeds and pine nuts with the teriyaki and cook briefly til they are coated and the teriyaki is sort of hardened onto the pan - not too much! If you don't have teriyaki soy will do just as well. Tip into your salad bowl and using your wooden spoon get the teriyaki off the bottom of the pan into the bowl too. 

3. Add the feta and then tear off tiny mini heads of broccoli into the bowl. It can seem ponderous but small bits of raw broccoli are amazing so worth it. 

4. Mix up the dressing and then put the sweet potato into the salad bowl, add the chopped nuts and the dressing. Add the basil and toss. Season to taste. 
SHARE:

7 October 2015

Jamie Oliver's Chicken and Squash Cacciatore

Having a conversation on Twitter the other day I realised I had no shame in admitting I love Jamie Oliver, yes sometimes my hand twitches with the urge to give hi a little slap but I can say that about most people and they don't consistently make cookery books that I love.

I went to Bree's house and she had the new Jamie Oliver, Everyday Super Food. I had added it to my Amazon wishlist but one look at hers and I bought it (half price in Waterstones) on the way home. Not that it is full to bursting with things I want to cook (I look to Jamie's 15-Minute Meals for that) but because I am trying to lose weight, I need a healthier diet, I live with a man who needs man food, but of the slimming variety and Everyday Super Food seems to have that all covered.

The Chicken and Squash Cacciatore with mushrooms, tomatoes, olives and bread is a good example of this. It's just not really my sort of thing, in fact I hate squash so, as suggested by Jamie, I substituted it for the mildly more bearable sweet potato. But it was delicious, filled us up and Joe cooked it. Successfully but not taking hours. So here it is. I didn't take a photo, I left out the olives and resisted the urge to have it with pasta and had one slice of bread as per the recipe.

I sometimes think Jamie's portion sizes are a little on the small side. This did both of us and a huge leftovers lunch for Joe the next day so it would do 4 but make sure you have bread and pudding. In fact, if you are so inclined this is a great one to cook with a view to having the leftovers for lunch the next day, it is filling and reheats well.

Chicken and Squash Cacciatore

Serves 4

1 onion
1 leek
4 cloves of garlic
2 rashers of smoked pancetta
2 sprigs of fresh rosemary
olive oil
2 fresh bay leaves
½ a butternut squash or 600g sweet potatoes
100g chestnut mushrooms
2 x 400g tins of plum tomatoes
250ml Chianti or other good red wine
4 chicken thighs, bone in
8 black olives (stone in)
200g seeded wholemeal bread

Pre-heat the oven to 190C/375F/Gas Mark 5. The recipe says it takes 1 hour 20 minutes and I'd agree with that, an hour of it is cooking time.

1.  Peel the onion and cut into eighths, trim, wash and slice the leek, peel and slice the garlic.

2. Place a large ovenproof casserole pan on a medium heat. Finely slice the pancetta, pick and finely chop the rosemary leaves, then place both in the pan with 1 tbsp of oil and the bay leaves.

3. Stir regularly for 2 minutes, then add the garlic, followed by the onion and leek. Cook for 10 mins, stirring regularly.

4. Meanwhile, chop the squash or the sweet potato (wash first) into bite sized chunks, leaving the skin on and discarding any squash seeds. Jamie chops the stalks off the mushrooms and adds all to the pan with the squash/sweet potato.

5. Remove and discard the chicken skin (we didn't) and add the chicken to the pan. Pour in the wine and let it reduce slightly, then add the tomatoes and break them up with a wooden spoon. Half fill each tin with water, swirl about and pour into the pan and mix it all together.

6. Destone the olives (we left them out completely), then poke them into the stew. Bring to a gentle simmer, the transfer to the oven to cook for an hour or until the sauce is thick and the chicken falls off the bone. Season as you wish and serve with bread to mop up the sauce.
SHARE:

31 January 2015

Jamie's Griddled Kinda Nicoise

My infatuation with Jamie Oliver is escalating. What started as mild disinterest is now a full-on passion. I was very kindly given Comfort Food for Christmas and am gearing up to cook something from that soon (pregnancy makes everything very slow) but the other night I was cooking for my mother and husband both of whom are trying to be virtuous in January and I'm very aware that the bump isn't getting its 5 a day so I randomly picked this Salad Nicoise from 15 minute meals. No potatoes and no egg but supremely delicious and finished by three of us and pretty easy to cook (and no it didn't take me 15 minutes but I'm a pretty slack cooker). Will be cooking this again and again - nice tuna steaks aren't cheap but the rest of the ingredients are and you can use what veg you have in your fridge.

There were quite a few things I tinkered with on this recipe, for example I'm not a huge fan of green beans and couldn't get the mixed green and yellow from the recipe so I used half beans and half broccoli tips.Where I've made changes I hope I've made them clear - I think the thing with salads is they are endlessly adaptable depending on what you have and like. I also refuse to serve anything on a board so I did this on one big platter... as you can see from the picture.

Griddle Tuna Salad
Serves 4

350g mixed green and yellow beans (or half green and half broccoli tips)
½ a baguette (I used a small one from Sainsburys)
12 black olives (Jamie says stone in, I say stone out)
3 ripe mixed-colour tomatoes (or red ones)
1 romaine lettuce
20g feta cheese
1 lemon

Tuna and Dressing
1 big bunch of fresh basil
6 anchovy fillets
1 lemon
4 tbsp extra virgin olive oil
2 x 200g tuna steaks (about 2.4cm thick)
1 tbsp red wine vinegar
1 heaped tsp wholegrain mustard
1 tsp runny honey

You will need a medium sized saucepan with a lid, a griddle pan and a liquidiser/magimix.

1. Line the beans up and cut off the stalks, put them into a pan of salted boiling water and put on a lid (I did my broccoli and beans for the same length of time).

2. Slice the baguette into 2cm chunks and, if you are following Jamie put onto the hot griddle pan. I think basting them in a tiny big of garlic oil pre-griddle would be lovely. Turn when golden.

3. Pick and reserve 10 baby sprigs of basil then rip off the rest of the leaves and blitz in the liquidiser with the anchovies, juice of 1 lemon, the extra virgin olive oil and a splash of water.

4. Pour about 40% of the dressing on to a nice serving platter (Jamie uses a separate one for the dressing and tuna and then places the whole lot on a board with the salad. I used one big platter and it worked very well).

5. Rub 10% of the dressing into the tun and season with salt and pepper. Pour the rest of the dressing into a big bowl with the vinegar, mustard and honey then mix together. Drain the cooked beans, remove the stones from the olives. roughly chop the tomatoes and add to the dressing and mix together.

6. Put the tuna on the griddle pan and cook for 2 minutes on each side or until blushing in the middle. How you cook your tuna is a matter of personal preference.

7. Chop the lettuce into 2cm chunks, tear the toasts into croutons and arrange over a large board (or on the platter) with the lettuce. I think it's nice to toss half the croutons in the bowl of tomatoes and dressing so they get a bit soggy.

8. Scatter the dressed beans, olives and tomatoes over the top. Tear each tuna steak in half or more and add to the dressing platter (or put on top of the dressing in the centre of the platter if you are not using a board).

9. Scatter over the reserved basil leaves, crumble over the feta and serve with lemon wedges (if you remember).


SHARE:

10 June 2014

Jamie Oliver's Incredibly Delicious Chicken Salad

As you may know my latest love is Jamie's 15-Minute Meals and anyone who's been coming to our house has been getting fed from it. I could do each recipe as I try them but as I've yet to try a dud this would be a bit of a one theme blog and I would be in trouble with the publishers. So I thought I would go for this one because so far it has been the one that Joe made the most excitable noises over and it's the one I thought he'd like least because it has 'salad' in the title and he's a boy.

It didn't take me 15 mins but not far off and it was really filling. We finished it between three of us but we're quite gluttonous - it would do four (as the recipe suggests) for lunch or if you had a pudding. I left out the lemons though because I hate them and THIS IS MY HOUSE JAMIE. And the cress. I just can't be doing with cress.

Incredibly Delicious Chicken Salad

Serves 4

for the salad:
1 head of broccoli
4 x 120g skinless chicken breasts
1 heaped tsp ground coriander
olive oil
1 mug (300g) Bulgar wheat
2 preserved lemons
1 bunch radishes
2 spring onions
½ a bunch fresh mint
2 tbsp extra virgin olive oil
3 tbsp red wine vinegar
2 tbsp sunflower seeds
1 punnet of cress

to serve:
4 tbsp fat-free natural yoghurt
2 tsp harissa
1 lemon

1. Fill up a medium pan with a lid, with boiling, salted water. Trim the end off the broccoli and cut the head to florets and add to the pan., cover and boil for 4 minutes.

2. On a large sheet of greaseproof paper, toss the chicken with the salt, pepper and ground coriander, then fold the paper over and bash with a rolling pin til it's about 1.5cm thick. Put into a large frying pan with 2 tablespoons of olive oil on a high heat turning after 3 or 4 minutes until golden and cooked through.

3. With tongs, remove and drain the broccoli (leaving the water in the pan on the heat) and put on a hot griddle until nicely charred.

4. Cook the Bulgar wheat according to the instructions on the packet in the broccoli water with the preserved lemons if you are using them.

5. Halve or crush the radishes, trim and finely slice the spring onions and the top leafy half of the mint then toss it all in a bowl with the extra virgin olive oil and vinegar and season to taste.

6. Drain the Bulgar wheat and tip into a large serving bowl, then mash and mix in the preserved lemons and arrange the broccoli on top.

7. Toss the sunflower seeds in the chicken pan, then slice the chicken and add to the salad scattering over the seeds and snipping over the cress.

8. Serve dolloped with the yoghurt and drizzles of harissa and with lemon wedges on the side.
SHARE:

14 April 2014

Chicken Zorba

This recipe has been in my family for years. So long that I have it written in my first ever recipe book (when I was about 14) and we still eat it now. My favourite way to eat this is with warm flat tortillas, salad, strips of cucumber and tomatoes. A great thing to have prepped ahead of time (marinade the chicken anywhere from 30 mins to overnight) for a spring/summer lunch and it's what we had as our first lunch in the garden in our new flat.

Chicken Zorba

serves 4 (light lunch)

4 chicken breasts
1 tbsp vegetable oil
juice of 2 limes
1 level tsp ground coriander
1 tsp ground cumin
½ tumeric
handful of mint, chopped
pinch of salt
150g Greek yoghurt
170g houmous

1. Mix the lime juice, spices and salt together in a bowl or bag big enough to marinade the chicken.

2. Cut the chicken into thin strips, mix with the lime juice and spices and marinade for at least 30 minutes.

3. When you are ready to eat mix the yoghurt and homous together and put into a serving bowl.

4. Heat the vegetable oil in a frying pan and fry the chicken for 8-10 minutes or until it is cooked through.

5. Sprinkle with mint and serve with the houmous/yoghurt mix, tortilla wraps, and salad.
SHARE:

25 September 2012

Tomato, Chipolata and New Potato Lunch Box

I bought River Cottage Every Day by Hugh Fearnley-Whittingstall for my father a couple of years ago and have longed to cook from it ever since. So, while dog sitting a couple of months ago, I wrote down a couple of the recipes and today I finally did one for lunch using the left over chipolata's from our supper last night.

This is incredibly simple, you don't really need a recipe for it but the dressing is delicious and is actually a nice filling lunch even though it doesn't look much.

Tomato, Chipolata and New Potato Lunch Box

Serves 1

4 cold boiled  new potatoes cut into large chunks
a handful of sweet, ripe cherry tomatoes
2-3 cold, cooked chipolata sausages

For the dressing:
1 tsp English mustard
1½ tsp cider or white wine vinegar
2 tbsp rapeseed oil
a small pinch of sugar
salt and pepper

You can obviously use as many potatoes, tomatoes, sausages as you like. I used this amount and was the right amount for my lunch... and I have a big appetite.

1. To make the dressing, whisk all the ingredients together in a bowl to combine.

2. Put the potatoes and tomatoes in a bowl, trickle most of the dressing over the top and toss together.

3. Transfer to your lunch box, place the chipolatas on top and trickle over the remaining dressing.


SHARE:

10 August 2011

Watercress Soup

I'm not very good with numbers, although I have known this for years and have whole heatedly given myself over to my numerical incompetence every now and again it rears it's ugly head in the kitchen. When ordering the ingredients for the Salmon and Watercress salad last week I ordered 200g of Watercress rather than the necessary 100g which is why on the hottest day of the year so far I was to be found making Watercress soup. It was actually really tasty and because I put in the fridge after I made it, it meant that the next night I could just heat it up which was actually much nicer than slaving in the kitchen in the sweltering heat. This is incredibly easy...

Watercress Soup

Serves 2 or 4 as a little starter

4 new potatoes, peeled and quartered
1 yellow onion, roughly chopped
1/2 pint stock, can be chicken or vegetable, I used Hugh F-W's souper mix which I had in the fridge
75g watercress
Milk
double cream if you have it
Butter
Olive Oil
salt and pepper

You just need a big pan for this and a blender.

1. Heat the oil and butter in the pan and sweat the onion until translucent - 5 or so minutes.

2. Add the potatoes and cook for a further 5 minutes without letting them get brown.

3. Add the watercress to the pan with the stock, season and then cover the pan and simmer it gently until the potatoes are tender. About 10 minutes.

4. Switch off the heat and allow the soup to cool a little before pouring it into the blender and whizzing it.

5. Clean the pan and return the blended soup to the heat and add enough milk to give it a nice consistency.

6. Bring to simmering point and then remove the pan from the heat, test the seasoning and serve in soup bowls with a swirl of the double cream and a few bits of chopped watercress if you've got any leftover.


SHARE:

19 July 2011

Hot American Chicken Salad

I've taken this recipe from Some Food for Thoughts - a cookery book sold in aid of Le Court Cheshire Home, Hampshire and other charities. This is a great amalgamation of recipes from residents in the care home, their friends and families - ranging from Chiang Mai Noodle Soup to Roast Monkfish and Pancetta with Herbs and loads inbetween. I'm not sure if it's available on the Internet but do get in touch with me if you'd like to know of any other recipes or details or how to order one.

This salad is so incredibly simple but wonderfully mayonnaisey and decadent and lets face it if the sun's out you don't want to be slaving over a hot stove or doing anything with chickpeas... do you really? We poached the chicken in stock the night before so it was all ready to go the next day.

HOT AMERICAN CHICKEN SALAD
Serves 4 
Ok so it's just cheese but I LOVE CHEESE

340g (12oz) cooked chicken, chopped quite small
4 sticks celery, finely sliced
4 spring onions, finely sliced
1/2 pint mayonnaise
2 tsp lemon juice
salt and freshly ground black pepper
113g (4oz) cheddar cheese, grated

For the topping:
1/2 packet kettle potato chips, crumbled
a little bit of paprika

Pre-heat the oven to 200C/400F. You will need an ovenproof dish for this - we used a medium sized rectangular one - you need to be careful not to overcook this or the sauce will separate!

1. Put all the ingredients into a bowl with 85g of the cheddar cheese, season and mix together. The cheese will be quite salty so taste it before adding too much salt.

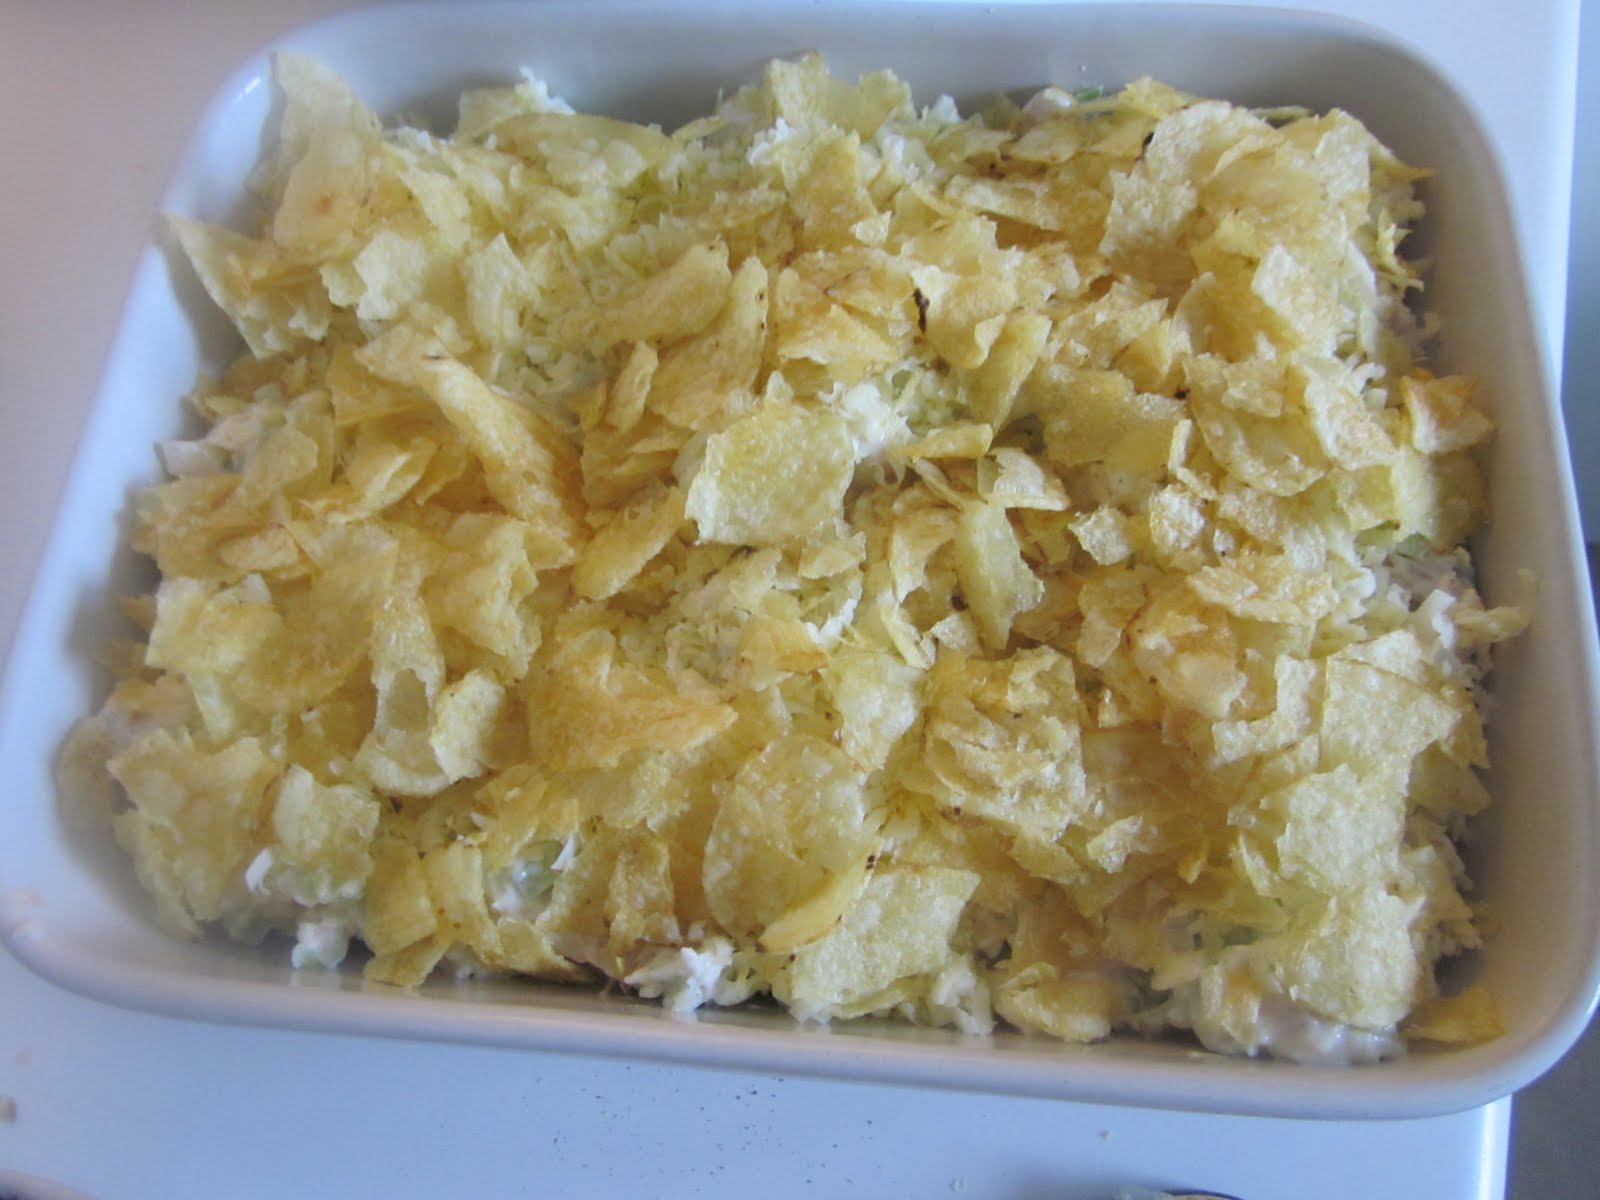
2. Turn into a shallow ovenproof dish, top with the remaining cheese, crisps and dash of paprika. We added some tobasco do this - just a few drizzles over the top should do.

3. Bake at 200C for 10-15 mins.

hot american chicken salad
Finished Chicken Salad
SHARE:

7 July 2011

Chicken and Bacon Tart

This is great for leftover chicken and in fact you can make it with anything you have hanging about in the fridge as long as you use the egg/sour cream filler anything can go in. The important thing about tarts is to season them enough - I know people are scared of salt but you can have a little taste of the filling before you pour it in and see. It's really too sad to have an under-seasoned tart. If you don't have chicken then a cheddar cheese and bacon version of this is great and you can always stick a leek in instead of onion.


CHICKEN & BACON TART
Serves 4

For the pastry:
220g plain flour
110g unsalted butter, cold and cubed
pinch of salt
1-2 tbsp chilled water

For the filling:
Chicken and bacon (on a small plate)
2 cooked chicken breasts or left over roast chicken
4 rashers of bacon
1 onion - or whatever you have. I like using large shallots and a bunch of 6 or so spring onions
2 tbsp olive oil
2 eggs
A handful of tarragon, chopped finely
300ml creme fraiche or sour cream
salt and pepper
A tiny pinch of garlic salt if you want

Preheat the oven to 180C/350F. You will need a fluted tart tin - I'm not entirely confident of the size of mine but I think probably about 23cm. This is also good if you want to make the pastry up before hand. The pasty does have to rest quite a bit and then you bake the base blind so it's not the speediest recipe in the world.

1. Make the pastry by sifting the flour and the salt into a large mixing bowl, adding the cubed butter and rubbing it into the flour like you are making some sort of strange double handed sign for money. You want the mixture to resemble breadcrumbs when you finished and you want as much air in it as possible so lift the mixture up in your hands as you rub the butter into the flour.

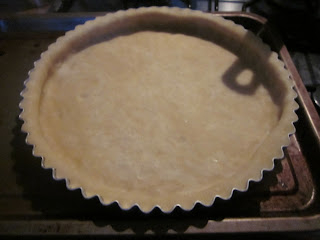
2. Wrap the pastry in cling film and let it rest in the fridge for at least half an hour. Roll it out so it is larger than you tin and then line the tin with it using a rolling pin rolled over the top of the tart tin to give you neat edges. Then put in the fridge for a further 20 mins to rest.
pastry case
Neat pastry case


3. Prick the bottom of the pastry case with a from, line with baking paper, fill with baking balls and then bake blind for 12-15 mins. When it's done leave it to cool and make the filling.

Baking balls!


4. Heat the oil in the pan and cook the onions over a medium heat until they are soft and translucent, stirring occasionally. Turn off the heat and add the shredded chicken and bacon and tip into the prepared pastry case.

Chicken and bacon in pastry case


5. Whisk together the eggs, creme fraiche, tarragon, salt or garlic salt, and pepper and pour over the tart.

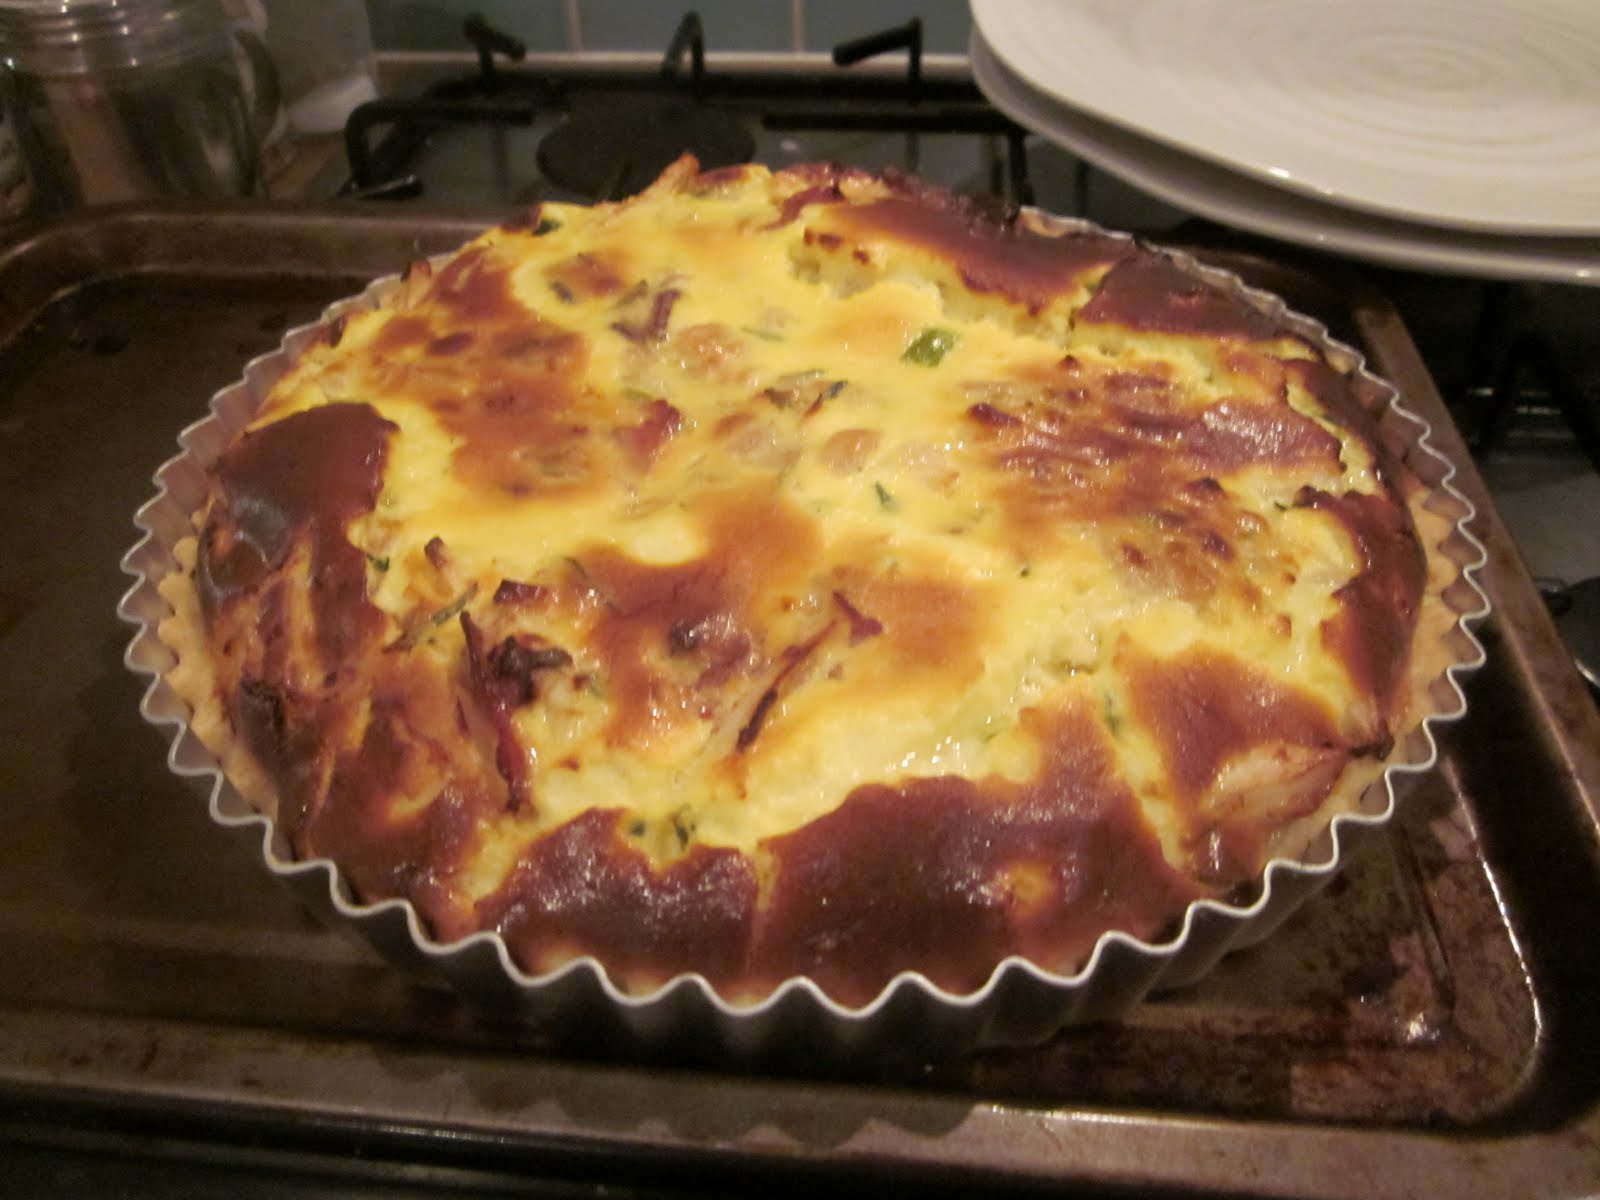
6. Cook in the preheated oven for 25-30 minutes or until golden on top. Serve with salad and onion marmalade or chutney.

Chicken and bacon tart
Finished Tart
SHARE:

27 June 2011

Sarah Raven's Shallot Tatin

I've adapted this slightly from Sarah Raven's recipe in her lovely Sarah Raven's Garden Cookbook which is just one of the nicest presents I've ever received. I must have had it for three or so years and I still read through it and find new things I want to try out. I really like making tarts, pies and quiches for Saturday lunch and this looked like a great twist on an old favourite. As I said I've amended it slightly...

SHALLOT TATIN
Serves 4-6

500g shallots, I used big sweet ones but any will do
250g Camembert, ideally some that's been left out of the fridge and cut into thickish slices
40g unsalted butter
2 tbsp olive oil
1 tbsp soft brown sugar
500g puff pastry
salt and black pepper

Preheat the oven to 200C/Gas Mark 6/ 400F. You will need an ovenproof pan or frying pan. Not a very big one though - you want the onions to fit quite snugly in it.

1. Peel the shallots but leave them whole. Cook the shallots in boiling water for 8-10 minutes, drain and leave to one side.

2. In your ovenproof pan heat the butter and oil and, when the butter has melted, sprinkle over the sugar and allow it to dissolve gently before adding the shallots.

cooking shallots
My Shallot's looking like squid
3. Cook the shallots until they are a rich golden caramel colour. This takes longer than you think - I found about 15-20 minutes was fine. Remove the onions from the heat and start rolling the pastry.

4. You want to roll the pastry out to be slightly bigger than the pan and round. If you are using shop bought pastry it will probably come in a square so roll it out and then cut it in a circle as you trim it down to the right size for your pan.


5. Spread the slices of cheese over the shallots and then lay the pastry on top, pushing the sides down slightly.

6. Bake the tart for about 25 minutes until it is golden and risen.


7. Remove from the oven, allow to cool for a couple of minutes and then, very carefully place a plate on top and flip the pan over very quickly. You may need to ease a spatula around the tart slightly first to loosen it.

Inverting the tatin - I got my Mumma to do it!


8. This is great with salads for a tasty lunch - looks impressive too but is surprisingly easy to make.

Sarah Raven's Shallot tatin
SHARE:

15 April 2011

Red Onion and Feta Quiche

I'm pretty obsessed with feta. Everyone says they tire of Greek food quickly but for me it's like heaven. Tomatoes and feta... I don't really need anything else. So any opportunity to find new things to do with feta is very welcome and this quiche was yummy with a tomato salad and some chutney.

Red Onion and Feta Quiche

Serves 3 (or 2 hungry gardeners)

For the pastry:
170g plain flour
85g butter (cold)
3tbsp cold water

For the filling:
1 red onion
150g feta cheese
150ml milk
2 eggs
Olive oil
Salt and pepper

Pre-heat the oven to 180C/350F/Gas Mark 4. You will need a loose bottomed quiche tin buttered and ready to go.

1. Put the pastry ingredients in the magimix and blitz together until it forms a ball. Turn onto a floured surface and knead lightly until smooth. Cover in clingfilm and put in the fridge for at least half an hour.

2. Toss the onion slices in olive oil and lay on a baking tray. Bake in the oven for about 10 mins until they are beginning to turn golden. When they are done you can leave to cool

3. Roll out the pastry on a floured surface to fit your quiche tin. Then bake the pastry blind (lining the case with greaseproof paper and using baking beans or something to weigh the paper down) for about 15 mins.
Baking balls

4. Put the onions in the pastry case, crumble the feta over (you can cut it into cubes if you want to be neater).

5. Whisk together the eggs, milk and some salt and pepper. Pour this over the onions and cheese and bake for 35 minutes until set and lightly browned.

6. Serve with whatever you like - but tomato salad was just yummy.
I meant to take a photo of a slice of it which was more appetizing... but I ate it all
SHARE:

21 March 2011

Mozarella and Parma Ham Tart with Basil

This is incredibly easy and so yummy that whoever you're making it for will be really impressed and you really won't have done anything much. If you were really organised you could make these ahead but you'd need a bigger fridge than I've got and they only take ten mins as it is anyway.

MOZARELLA AND PARMA HAM TART
Serves 4

500g packet puff pastry (I like to roll it myself but you can get pre-rolled if you prefer)
6 vine-ripened tomatoes
6 slices parma ham
125ml olive oil
3 cloves garlic, peeled
1 ball mozzarella (unless you are completely decadent and naughty in which case have 2), drained and torn.
Basil leaves (about 6 or 7)
1 egg, beaten to use as egg wash

Pre-heat the oven to 180C/350F/Gas Mark 4. Now you really can chop the tomatoes and make the garlic oil before... these are basically like pizza's but without all the faffing with the dough.

1. Slice the tops and bottoms off the tomatoes and then cut into reasonably thin slices and lay out on a plate covered in kitchen roll. Then cover the tomatoes with kitchen roll so any excess liquid is absorbed. You don't want soggy tarts.

2. Put the garlic and olive oil in a bowl and bring to the boil, then turn the heat to low and let it cook for 5 minutes or until the garlic is brown. Turn the heat off and set aside.

3. Remove the garlic from the oil and slice. Keep the oil ready for basting the pastry.

4. Roll out the pastry or not if you've got pre-rolled. I use a side plate to measure out 4 circles from the dough (it should be about 3mm thick). Place the circles on greased baking trays (I use reusable baking sheets so I don't have to faff about with butter).

5. Using the tip of a knife and being sure you don't cut through  the pastry, make a circle about 1cm from the edge of the pastry disc.
Pastry base with very wonky guideline - just because I don't want you to feel pressured obviously

6. Brush the outside of this circle with the egg wash and the inside with garlic oil.

7. Staying inside the border line make a layer of tomato's first and then if you want to be really garlicky add some of the chopped up garlic.

8. Sprinkle over the torn up mozzarella and then do the same with torn parma ham.
Tarts pre-oven

9. Cook in the oven for 12-15 minutes (slightly longer maybe, my oven is a bit hot) until the pastry is puffed and golden and everything looks yummy.

10. Sprinkle with torn basil and serve 1 per person with onion jam or something similar.
Finished tart


SHARE:
© Blue Sky and Bunting. All rights reserved.
Blogger Templates by pipdig