22 December 2010

Chocolate Peanut Butter Cups

I love making canapes for parties. I often love it more than the party itself but, not having a sweet tooth, I sometimes feel like I let the side down rather when it comes to the non-savoury goodies. In fact, I never have any. This year whilst making mince pies I decided to push the boat out and attempt a festive sweet treat. I flicked through Nigella's Christmas - which I had been quite dismissive of until recently - and decided on trying out her Chocolate Peanut Butter Cups, mostly because Joe was practically licking the picture which is usually a good sign.

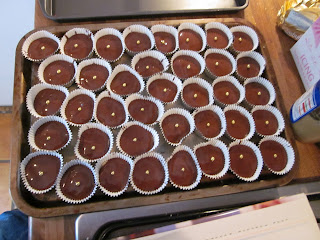
They were really easy to make, looked lovely and festive and went down a storm so here it is

NIGELLA LAWSON'S CHOCOLATE PEANUT-BUTTER CUPS
Makes approx 45

For the Base:
50g soft dark brown sugar
200g icing sugar
50g soft butter
200g smooth peanut butter

For the Topping:
200g milk chocolate, chopped
100g dark chocolate, chopped
edible gold buttons or stars (I used little balls that I found in the cook shop in Chiswick)

45-50 petit-four paper cases (I used silver ones, Nigella prefers gold)

1. Mix together the brown sugar, icing sugar, butter and peanut butter - you can either do this by hand, in a freestanding mixer or, like me, in the trusty magimix - until you've got a sandy paste.
The sandy peanut-butter mix

2. Using your hands form small 1 tsp discs to go in the bottom of the petit-four cases. Press the sandy mixture as best you can to form a layer at the bottom of each case. I started off a bit nervously with this and found that I had to go back and re-do some as I was being a bit mean!

3. Melt the chocolates gently in a glass bowl over a pan of simmering water (make sure the bottom of the bowl is not touching the water). You can do this in a microwave if you are brave but I always burn the chocolate.

4. Stir the melted chocolates together and allow to cool a little and then spoon 1 tsp into each of the petit-four case covering the peanut-butter base. I found that I only just had enough to go round so I made 45 instead of Nigella's 48-50 but you can always whizz up some more chocolate so it's not a disaster if you do runout.

5. Decorate with your edible gold button or star or whatever of choice. Put in the fridge to set for 30 minutes or so before serving.

chocolate peanut butter cups
You can make these two days ahead and keep, loosely covered in a cool place. I made them on the day and although they were still yummy a couple of days after the chocolate was quite hard from being in the fridge. I was surprised at how easy and satisfying these were to make - minimum fuss, maximum result. Highly recommended.
SHARE:

20 December 2010

Festive Gush

I try not to just randomly gush on my blogs but really I have to be allowed just a little one. As usual weedling my mother's Christmas present request from her was like pulling teeth - she always wants a macaroni necklace or a tin foil card even though I'm 27 and not the creative daughter (to be fair from my sister she'd expect a fusili necklace with glitter and a card that involved cutting in a straight line). This year I persuaded her that she wanted the non-rotating Babyliss Big Hair that I've wanted for some time. Decision made. This immediately means that it is IMPOSSIBLE to get. You can get the rotating one that everyone says is crap but not the reasonably priced mum-friendly non-rotator.

Soooo... finally last week she decided that she'd like two large breakfast cups but wasn't sure what sort. It turns out that it's probably easier to get a unicorn than it is to get a nice breakfast cup. Eventually we settled on ones from Burleigh which are trusty and lovely and match a cow creamer she has (she LOVES cow creamers... who doesn't to be honest). Great. Ordered them only to have it confirmed that it could take 28 days! Bit horrid not having your presents on the day but did think that it's best to have the right thing rather than anything that arrives on time. Phoned up Burleigh to beg for speed and they said they'd do what they could. Imagine my surprise when two days later a lovely box from them arrives.

Now, there is a slight problem. Instead of the 3/4 pint breakfast cups I ordered I received the 1/3 pint teacups and saucers. Still lovely but not right. This sent me into a spiral of panic - so much so that I actually dreamt about trying to find cups last night. However, one phone call to them and not only was my panic soothed but I was left glowing with pleasure and the urge to say 'well you don't get service like that anymore'. Not only are they going to do their best to get the cups couriered to me as soon as they can they have told me that I can keep the teacups with their compliments as it was their fault for sending them to me. It actually took two or three attempts for them to get this concept through to me. I mean, we have to pay £1.32 every time Joe's dad forwards his post to us. Buy Burleigh everyone it's a wonderful old fashioned shopping experience.
SHARE:

17 December 2010

My Mince Pies

Everyone has their own way of doing these - different pastries, different fillings, different family traditions to be followed. I love making mince pies but I don't actually like eating them so I base my recipes on Joe's reaction and therefore have created a recipe that's a bit Delia, a bit Nigella and a bit stolen from my Tante Marie cookery course. I do love the idea of making mini ones with stars on top a la Nigella and everyone else but I just can't be bothered to fork out for a tin that at the moment I'm probably only going to use once a year. I'll add it to my Amazon wishlist and see how much it calls to me. So anyway I make big ones with stars on top (sometimes I make macaroon topping which is a nice change if you are a bit over pied). I also buy my mincemeat - maybe next year I'll make Nigella's cranberry one but what with the hamper this year I think I may be biting off more than I can chew.

MINCE PIES (makes about 24 normal size pies)

240g plain flour
60g vegetable shortening/suet, or lard
60g cold butter
juice of 1 orange (or a couple of satsumas if that's what you have)
pinch of salt

350g mincemeat

milk to stick the lids on
icing sugar to dust

You will need a bun tray or two and I use the trusty magimix to make the pastry because it's quick and I'm lazy. I use a crinkle edged cutter but a plain circle would do just as well if that's what you've got.

1. Put the flour, suet/shortening/lard and small cubes of very cold butter in the freezer for 20 mins. Not quite sure why, Nigella recommends it and it does help make a very nice pastry.
My tuppaware of flour and fat

2. Squeeze the orange juice into a bowl, add the pinch of salt and put in the fridge.

3. After the 20 mins put the flour and fats into the magimix and blitz until it's all crumbly. Then start adding the orange juice whilst pulsing the mixture, stopping just before it comes together. The amount of liquid you use really just depends on the size of the orange. Sometimes I use it all and have to add a bit of chilled water sometimes I don't use all of the juice. You have to do this by eye I'm afraid.

4. Anyway, when it looks like it's about to come together tip it out onto a floured surface and bring it together with your hands and knead it about a bit. Divide into two, make sort of flat discs out of them, cover in clingfilm and put in the fridge for half and hour. Pre-heat the oven to 220C/428F/Gas Mark 7.

5. When you are ready to make the pies roll one of the discs out of a floured surface. This is lovely pastry that's really stretchy so you can afford to roll it quite thin but remember you still need a good vehicle for the heavy mince meat. I usually cut out bottoms and tops at the same time - if I'm doing the star tops - so I know I've got even amounts.

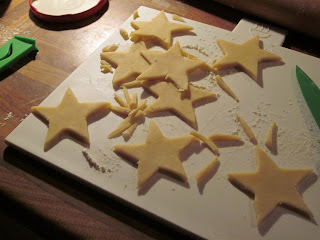
Star mince pie tops
6. Place the cut circles in the bun tray and add a teaspoon on the mincemeat. I'm usually quite slapdash about this sort of thing but I actually think it's quite important to just smooth the mincemeat out a bit with the spoon. This makes the tops stay on better when the mincemeat gets all bubbly whilst cooking. Dab around the edge with some milk - I use my finger - and then place the star  on top pressing down on the ends slightly so the milk sticks them to the pie base (this will inevitably unstick during cooking).
Loaded mince pies

7. Cook for about 10 minutes - I check after 9 and take out when they look right to you.

8. You can make these up to a week ahead and just heat up for 2 mins in a hot oven before serving then sprinkle with a little icing sugar and serve with brandy butter.
Finished pies
They don't look that beautiful but they do look homemade!


SHARE:

14 December 2010

Festive Fridge

We're having a sophisticated and grown up drinks party next weekend that will descend into a booze fuelled and ridiculous festive boogie at some stage and I went and stocked my fridge up for it yesterday and realised that nothing makes Joe more excited than me loading the trolley up with 7 packs of butter and nothing makes me happier than seeing this...
Note excess butter, cream and smoked trout
SHARE:

6 December 2010

I heart Lakeland

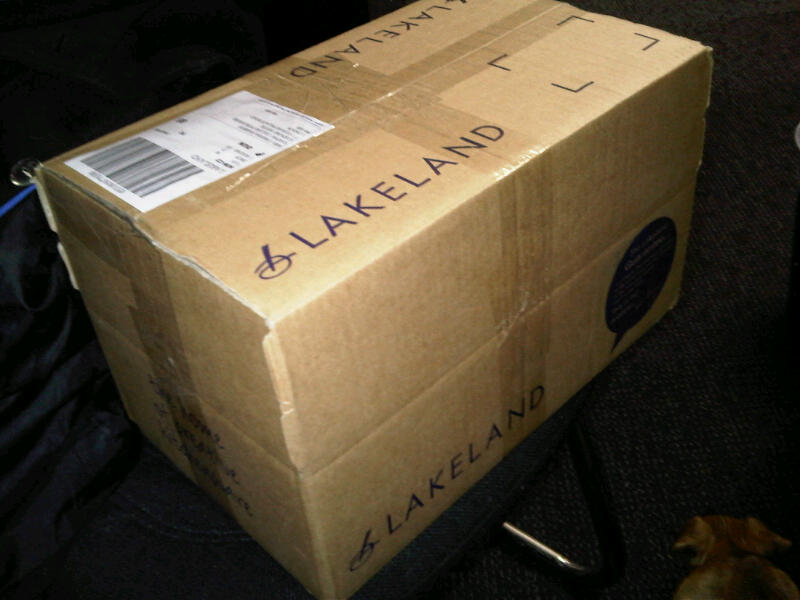
Box full of parcels
Please note tasteful washing drying on radiator
Ok I don't 'heart' them. That's bollocks. I think it's more realistic to say I have an unhealthy obsession with Lakeland. So unhealthy that there is a bulging box of kilner jars, jam lids and cordial bottles in the middle of our bedroom floor between me and my bathroom. I knew it had got bad when Joe smirked up to me with a tube of edible silver stars which he'd found on our spare bed. Up until recently our spare room had been half Joe's study and half my imaginary secret place when things could be kept and their presence there would cancel out their purchase cost. But now we have people staying and my sickness is staring me in the face every morning as I try to get dressed in sub-zero temperatures.

The problem escalated when I decided to make Joe's family a hamper for Christmas. In seven years we've managed to avoid spending Christmas together - people think this is weird but we're perfectly happy about it, I think Joe welcomes the 4 day nag break (he manages to be in a no-signal zone in Cheshire most years). This year I was going to be with them but they've decided to go to France and little Miss Mouse is not old enough to have a passport yet so we will be in Hampshire with my parents cuddling the dog and cleaning up her continuous peeing (the little princess doesn't like the cold). So, rather than get them a load of individual presents they won't want (they all posses massive brains which I can't keep up with) I thought what a lovely idea to make them a foody hamper.

I immediately ordered kilner jars, jam jars, jam lids, labels, decorations and edible stars and then realised that this could backfire horribly. I could be sending Joe to France with a box full of disgusting horrors in various different size jars. Too late! Three massive Lakeland boxes appeared at my desk and I've been elbow deep in shallots and vodka ever since. I'm hoping that if it is all gross I'll just never know about it.

I'm having the last laugh though - this obsession has contributed towards Joe allowing me to get  a new pantry cupboard in my teeny tiny kitchen as I'm now making so many chutneys, vinegars, jams and oils that I'm keeping ingredients in cardboard boxes on the kitchen floor and even he can see this is not ideal. I'm so excited it's literally all I think about - I lay awake the other night planning what would go on what shelf.

Eek another box just arrived...

Box
SHARE:

3 December 2010

New Baby Brownies


I find it really hard to know what to get friends who have just had babies as they get loads of presents and some people are off some things and some people will only use one type of thing so I always try and bake something instead. New parents are likely to have lots of visitors so I think it probably helps to have baked goods to offer them, I also thing a quick sugar fix that can be eaten one handed is a must for nursing mothers! So in honour of little Lilly who was born on Tuesday here are my New Baby Brownies.

NEW BABY BROWNIES

Preheat the oven to 180C/356F/Gas Mark 4

300g caster sugar (I like to use golden caster sugar here but you don't have to)
250g butter
250g chocolate, broken into pieces and 50g put aside
3 large eggs and 1 extra egg yolk, beaten with a fork
60g plain flour
60g good quality cocoa powder
1/2 tsp baking powder
pinch of salt

I make them in a disposable foil roasting tin because they never have to go anywhere else and when they're finished it can just be thrown away but any Swiss roll tin will do - the small it is the fatter they'll be and vice versa. If you are using a non-disposable Swiss roll tin then you'll need to line the bottom with baking paper.

1. Cream the butter and sugar together - ideally use a Kitchenaid as the mixer on this is ideal, I use my trusty Magimix but if you don't have either then do by hand. This needs to be really creamy though so be prepared for a bit of arm ache if you are doing it manually.

2. Melt the 200g of chocolate pieces in a bowl over a simmering pan of water (make sure the bottom of the bowl is not touching the water). Once the chocolate is melted then take it off the heat and stand to one side.
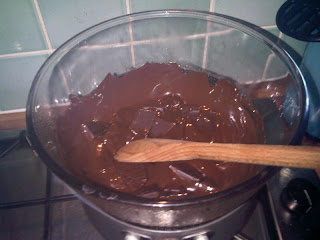
Melting chocolate
3. Sift together the flour, cocoa powder, baking powder and salt into a bowl.

Sifted flour and cocoa powder
Sifted dry ingredients
 
4. Slowly add the beaten eggs to the butter and sugar mixing in between additions. If you are using a kitchen aid then remove the bowl once all the eggs are added. I have a Magimix so I tip the mixture into a new mixing bowl.

 5. Break up the remaining 50g of chocolate into small pieces. I do this by putting them in a freezer bag and bashing them with a rolling pin. Very satisfying but slightly annoying for our upstairs neighbours. Add the melted chocolate and chocolate pieces to the butter/sugar/egg mix, folding them in with a metal spoon.
Post-chocolate, pre-flour
6. Finally fold in the dry ingredients - try to be gentle as you don't want to knock all the air out.


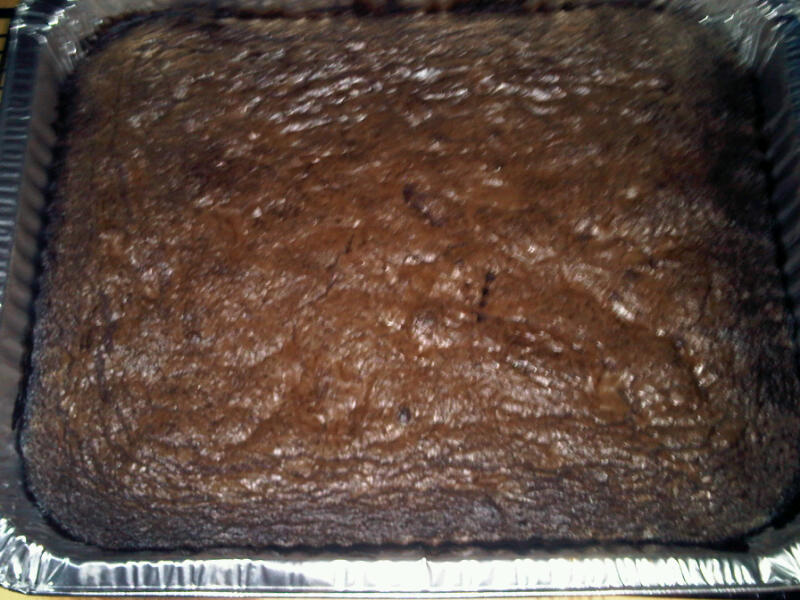
7. Pour the mixture into your tin, smooth the top and put in the oven for about 25-30mins. Brownies continue to cook as they cool so you want them to be cooked enough so that a skewer comes out sticky but not covered in raw ingredients when poked in the centre.

8. Leave to cool on a rack in their tin for at least an hour before removing them or cutting them into their squares. If you are being fancy schmancy you can dust with icing sugar. But I never do.
Chocoloate brownies 

SHARE:
© Blue Sky and Bunting. All rights reserved.
Blogger Templates by pipdig